Growing Hops

baby-cascadeLast year we brewed a wet hop IPA with hops we picked from some friends. For reasons we’ll talk about later, it didn’t turn out that well.  But we had enough fun picking the hops that we thought we’d plant our own this year.

Nobody except hop breeders grow hops from seed.  Instead you buy rhizomes, which are short pieces of hop root from which the hop vines (actually called bines) will grow.  Rhizomes can typically be pre-ordered in February, are cut from existing hop plants around late March or early April, and shipped to your door in an opaque, sandwich-sized bag.  They must be kept cool and moist until the ground is thawed enough to dig, but late enough that the hop shoots won’t get hit with too much frost.

Planting

Hops grow quickly and often take over whatever structure or plant they are near.  But they also spread quickly underground too, expanding their root system through the rhizome.  Since the hop vines can grow at any point along the root system, it’s common for new shoots to pop up far away from where the original plant is established.  Most people seem to just mow them off or remove them.  To us, that seemed like a lot of work over many years, and we’d rather do a lot of work once and never again.
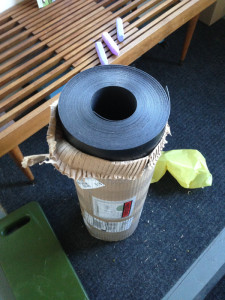
rhizome-barrierInstead you can buy “rhizome barrier”, which is thick flexible rolled plastic typically used for bamboo, another plant that spreads vigorously through rhizomes.  This should be buried 18 inches below the surface around the entire area where your hops will be growing, with a few inches left above to ensure the hop roots don’t jump over the top.  When the roots hit the rhizome barrier they have nowhere else to go.  Simple!

Hop rhizomes should be planted 1 or 2 inches deep in a hole filled with compost or soil mixed with slow-release fertilizers.  Don’t over-do it on the fertilizer since you can always add more later, but tons of compost is fine.  Hop rhizomes actually have a “top” side, but if you’re not sure which side is which, planting them horizontally is fine too.

Growing
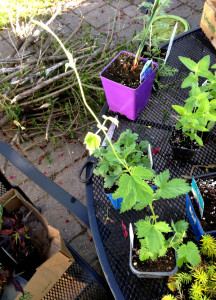
baby-willametteHops require lots of nutrients and water, but if you’re fertilizing them it’s easy to use the wrong mix or the right mix at the wrong time.  It’s also easy to over-water them, so make sure they are planted in an area with good drainage.  Short, frequent watering is better to ensure the soil doesn’t stay too wet.   But you can’t go wrong adding more compost around the plant, especially after harvest, and mulching is a great option to conserve water and keep weeds away.

Once you have shoots about a foot long, choose the strongest two or three and clip the rest.  While it may seem like you’re going to kill the plant, you won’t.  Selecting the the best shoots lets the plant concentrate its energy towards growing hop cones instead of growing hop bines.  Train the shoots up a trellis or hop coir (thick twine) to a rope strung between poles, though any high anchor point like the side of a building will do.  If you don’t have poles you can grow them horizontally along a fence too.
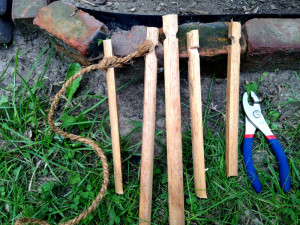
stakesAt some point they stop growing up, and start growing out by creating “sidearms” from the branch of the leaves and the main vine.  These are where the hop flowers will actually grow instead of on the main vine.  When the sidearms get long enough you’ll need to make sure they have somewhere to grow too, by either training them up the main bine or letting them attach to a trellis if you have one.

Harvesting
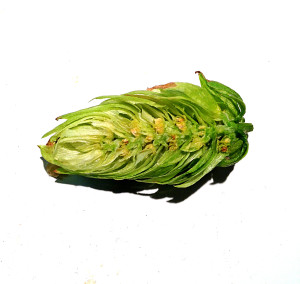
halfhopSometime in August or early September, depending on your climate, the cones that grow from the hop flowers will be ready to harvest.  Since this is nature, different parts of the same plant and even different plants might be ready to harvest at different times, so you need to monitor their progress.  When the hop cones have a papery feel, when they spring back to shape when you press them, and when they have that great hop aroma when you crush them by rolling them around in your hands, they are ready to pick.  You can also cut one in half vertically with a sharp knife and look for the lupulin glands in the middle of the hop; if they are abundant and bright yellow, it’s probably ready.

After picking you must either use the hops within 24 hours or dry them.  Hops will oxidize, spoil, rot, and mold if left too long, so if you can pick them and immediately toss them into boiling wort you’re doing it right.  But if you want to dry them for later use, putting the hops onto a window screens on top of box fans will do the job after a few days, provided you turn the hops periodically.

After the harvest you can cut the hop bines near the base and discard the bines and leaves.  Don’t compost them if they had any kind of disease.  Then cover the base of the hop with some compost and mulch, and leave for next year!
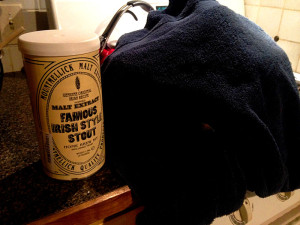
Mountmellick Extract Stout

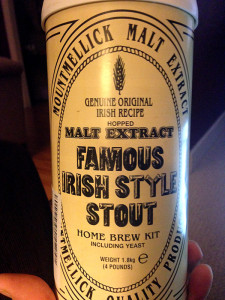
We’ve had a can of Mountmellick Stout kicking around for a while.  We also had small amounts of specialty malts in the grain cellar that needed using up, which are perfect for a mini-mash to go with the can.

Mountmellick is pre-hopped so we didn’t need additional bittering hops, but we had some left-over UK Fuggles to use for aroma.  This should give the beer a bit more hop character above the malt extract’s bitterness.

The Recipe

Name: Mountmellick+
Batch size: 3 gallons
Expected OG: 1.068 (75% efficiency)
Expected FG: 1.017
Expected IBU: ?
Partial Mash: 30m @ 153°F

  4   lbs Mountmellick Stout pre-hopped extract
  1.5 lbs Pale 2-row
  7.0 oz  UK Brown
  4.0 oz  UK Pale Chocolate (200L)
  4.0 oz  Belgian Special B
  4.0 oz  Briess C80L
  3.0 oz  UK Chocolate (425L)
  2.0 oz  Briess C120L
  2.0 oz  Briess C150L

  0.5 oz  UK Fuggle 5.3% AA @ 20m
  0.5 oz  UK Fuggle 5.3% AA @ 5m
  1 pack Mountmellick yeast
1/2 pack Safale S05 dry yeast

The Brew

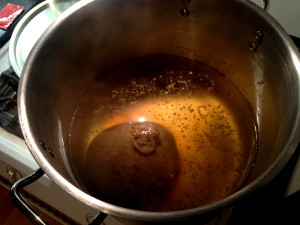
mashWe crushed the partial mash grains and heated our strike water to 160°F.  Mash-in dropped the temperature to 152°F and we turned the stove on to raise temperature slightly.  Once we got there, we turned off the burner and left the mash alone.  Unfortunately the temperature at the top of the kettle wasn’t the temperature at the bottom,and when everything finally stabilized the entire mash was sitting at 163°F for about an hour.  While unexpected, it won’t ruin the beer, since most of the sugar in the wort came from the Mountmellick can instead of our partial mash.

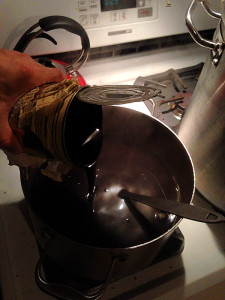
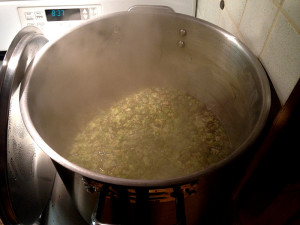
extractWe removed our grain bag, sparged with more filtered water, and added that back to the main kettle.  When the wort began to boil we moved part of it to a smaller pot and added the can of Mountmellick extract to that, mixing well to ensure nothing would scorch on the bottom.  We added the small pot back to the kettle and proceeded with a 30 minute boil, starting at 17.5° Plato (1.072).

The astute among you will notice we’re already over our target gravity of 1.068, and after boiling the gravity would only be higher.  It appears we completely mis-judged our efficiency and got closer to 90% of the potential extract from our the partial mash.

Since we weren’t trying to make an Imperial Stout we topped up with 1 gallon of cold filtered water to result in about 4 gallons of 15° Plato wort (1.061) before adding the yeast and fermenting at 68°F for about 10 days.  When racking to the keg after fermentation was complete, the final gravity was 1.024 for about 4.9% ABV.

mountmellick-glassThe Beer

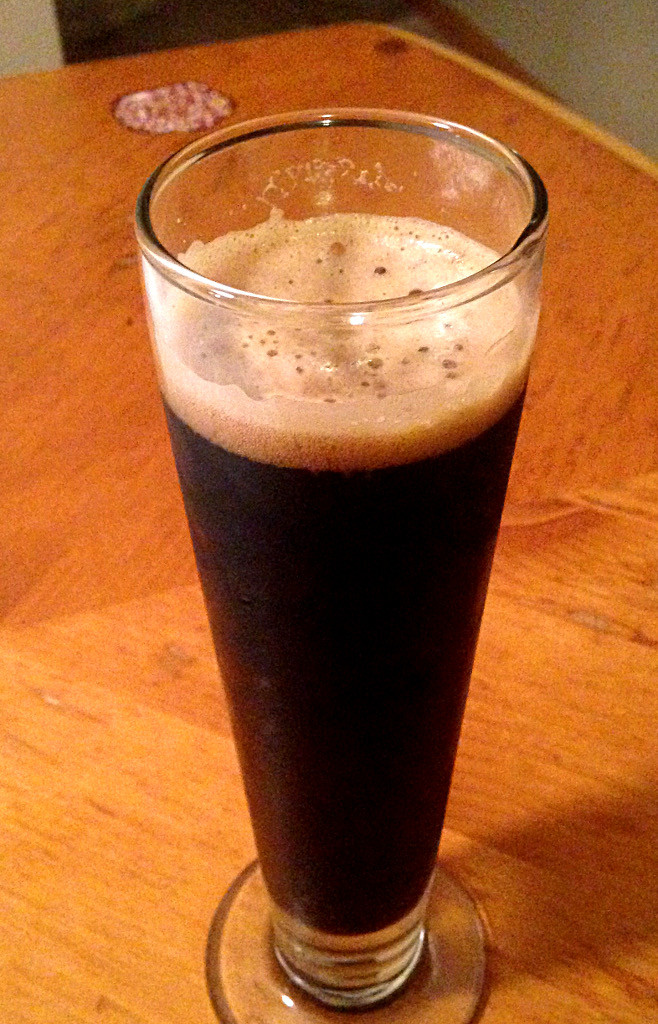
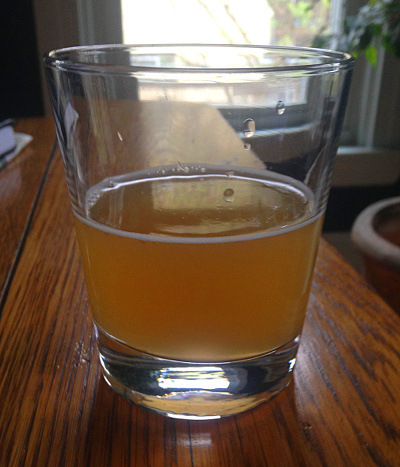
The result was a thick, black, roasty stout with significant bitterness and a dense rocky head that stuck around.  Pretty good for an extract beer and a screwed-up partial mash.  The bitterness was higher than we expected, but that’s probably because the pre-hopped malt extract can is meant for a 5 gallon batch and we were using it for 3.

What would we do differently next time, if another can of Mountmellick happened to drop from the sky?  First, we’d move all our hop additions to 5 minutes or less, and use a hopstand to achieve more flavor and aroma.  We’d also more tightly control the partial mash temperature to keep the beer lighter in body.  But we’d also not bother doing a partial mash, since the gravity contribution of the pale malt is likely too high and would have significantly increased the alchohol had it been successful.

Marigolds

marigolds
Garland Orange “African” marigold (Tagetes erecta)

We’ve got a ton of these tall, prolific, orange marigolds growing in our garden, they’re shading out the other plants, and they need some pruning.  But why waste the beautiful flowers?  They are edible, and apparently “some cultivars are strong and bitter” which sounds a lot like how you’d describe hops.  Let’s put them in beer!

Since this is an experiment, and our inspiration came to us two hours before we had to be somewhere else, we took some shortcuts.

marigold-ingredients

The Recipe

Name: Marigold Imperial Pils
Batch size: 2.5 liters
Boil size: 3 liters
Expected OG: 1.065 (75% efficiency)
Expected FG: 1.014
Expected IBU: ??

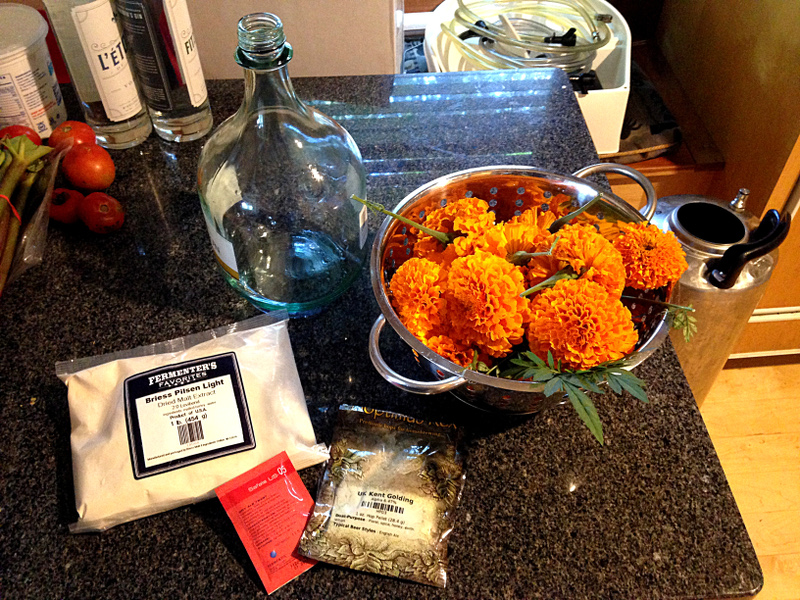
  1 lb Briess Pilsen Light DME

  0.25 oz Kent Goldings 6.47%AA @ 30m
  0.5  oz Garland Orange marigold petals @ 30m
  1.0  oz Garland Orange marigold petals @ 20m
  1.0  oz Garland Orange marigold petals @ 10m
  1.0  oz Garland Orange marigold petals @  0m
          Steep hops & petals 1 hour after boil

  2/3 pack Safale S-05 dry yeast (66F for two weeks)

The Brew

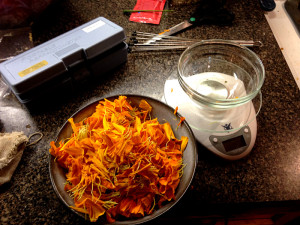
marigold-petalsFirst, about the liters…  this time we’re fermenting in old 3-liter wine jugs, so obviously we don’t want to end up with more than 2.75 or so liters of wort, or we’d have blowoff.  So we settled on 2.5.

Then, instead of tossing whole marigold heads into the boil, we pulled and used only the petals to avoid off-flavors from the stem and other flower parts.  We did an hour-long “marigold-stand” at the end of the brew to extract maximum marigold flavor and aroma from the star ingredient.

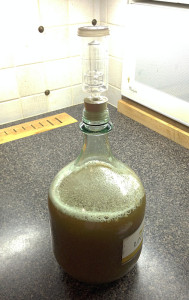
marigold-fermentingWe abbreviated the boil to 30 minutes because we really wanted to see what the marigolds would contribute, not the hops.  But we did add a small amount of Kent Golding hops to provide initial bitterness to the beer.  We did not re-hydrate the yeast because we pitched 2/3 pack of yeast into 2.5 liters of wort, plenty to counteract any that might die, and hugely over-pitching for this small of a batch.

Not surprisingly due to the amount of yeast, fermentation was vigorous and the smell was quite floral.  Since we used DME, had a well-controlled temperature, and over-pitched yeast, the beer fermented out fully and ended at 1.014 for 7% ABV.

The Result

You definitely get floral smell and taste from this beer.  While it doesn’t quite taste like marigolds, it certainly smells and tastes like some kind of flower.  There’s a slight hint of bitterness too, but not as much orange color as we had expected.  Unfortunately, the beer is way too sweet due to the high amount of malt extract used for the small batch.  Next time we’d use two-thirds of a pound of Pilsen Light DME for an expected OG of 1.043, but keep the hopping and marigold rates the same, leading to a light, slightly-malty beer that would let the taste and aroma of the marigolds shine.

Small-batch Session IPA

small-batch-session-ipaNow that it’s summer and the days get hot, we want a drinkable beer without a ton of alcohol but no lack of hoppiness.  That means a session IPA.  We’ve had some bad ones, and we’ve had some good ones, so what makes a good one?  Can we make a good one?

The generally accepted definition of a session IPA seems to be a hoppy pale ale that is 5% ABV or less.  Even 5% seems pretty high ABV to us, since we want to drink a lot of it and not fall off the bench.  The term “session” originally came from the UK where most of the “milds” that pub patrons drank were between 3% and 4% ABV.  To us 3% or 4% seems just about right; but a 5% “session IPA” is really just a hoppy American Pale Ale and no challenge whatsoever…

The Challenge

Since we enjoy difficult things, our goal was to create a 3.5% ABV beer with the hop character of an IPA and enough maltiness and body that nobody would confuse it with Bud Light.  It’s supposedly difficult to get the right balance of maltiness, body, and hoppiness with very low alcohol beers, since the low original gravity often means lower body and thinner taste.  That implies fewer hops since the lack of malt flavor won’t be able to balance the bitterness as well.  But since IPAs are known for the buckets of hops brewers throw in, how could we bridge the gap?

First, we can mash higher to favor the alpha amylase enzyme, producing a sweeter, less fermentable wort which will raise the finishing gravity and provide more body.  Second, we can add more specialty malts than usual to increase the malty flavor of the beer.  Third, we can add quick oats to increase the amount of beta glucans, which are not fermentable and add body to the wort.

For the hop side of things, while we’re shooting for an IPA, we still need to keep the hop rate lower than an IPA to ensure we don’t end up with hop tea.  We can use more hops than normal for a 1.040 beer since we’re increasing the body, but we’ve still got to be careful.  We’re aiming for about 70 IBU total, but only 25 of those IBU from the early bittering hops.  The rest will come from late aroma/flavor hops and a hopstand, which will contribute a much mellower bitterness.  Fourth, we’ll use an English yeast that accentuates the malt more than a clean US strain like S-05 would.

Finally, the weather is so nice right now, we’re going to brew this outside on our 3-gallon 120V electric Brew-In-A-Bag system, but we’re still going to make a 5-gallon batch.  This means we need to top up from 3 gallons to 5 after our boil, making some gravity calculations more complicated.

The Recipe

Name: Session IPA
Batch size: 5 gallons
Boil size: 3.8 gallons
Expected OG: 1.040 (75% efficiency)
Expected FG: 1.012
Expected IBU: 70 (25 early, 45 aroma/flavor/hopstand)
Mash: 90m @ 156°F

  3.3 lbs Muntons Maris Otter
  2.5 lbs Briess Vienna
 13.3 oz  Bob's Red Mill quick oats
  7.0 oz  Briess Crystal 10L
  7.0 oz  Muntons Crystal 60L

  0.6 oz Centennial 9.5%AA @ 60m
  1.0 oz Centennial 9.5%AA @ 10m
         Whirlfloc & yeast nutrient @ 10m
  2.0 oz Cascade    6.4%AA @ 5m
  2.0 oz Centennial 9.0%AA @ 5m
  1.4 oz Centennial 9.4%AA @ 0m (20m hopstand)
  2.0 oz Cascade    6.4%AA @ 0m (20m hopstand)
  1.0 oz Centennial 9.5%AA dry-hop 5 days

  1 pack Wyeast 1275 Thames Valley Ale

The Brew

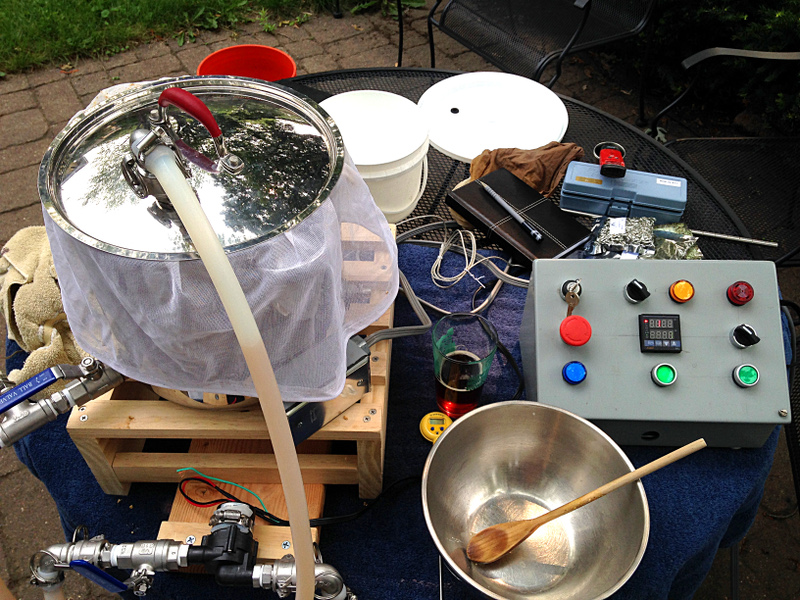
We have an element protector screen on our small system, which ensures the bag containing up to 7lbs of grain does not rest on the element, which could cause scorching or put strain on the element’s gasket.  Unfortunately, this screen isn’t quite the right size for our kettle, and doesn’t have enough holes for good circulation.  This meant we spent a while playing with the pump’s output valve before finding the right flow rate that wouldn’t suck the bag down into the kettle through the gap between the protector screen and the kettle wall.  Once found we could finally leave the mash alone and not worry about getting grain into the recirculating wort.

This was also the first brew with a new 5500W Camco ULWD ripple element.  We had scorching on the previous LWD element in this system, especially with a recent Hefeweizen (though it didn’t affect the flavor).  While the old element was a 5500W/240V LWD, we ran it at 120V which quarters the wattage to 1375 and thus also quarters the watt density into ULWD territory.  But for whatever reason we still had scorching, so the element had to go.  It was quite difficult to bend the Camco ripple element to the right shape, while still ensuring it could be maneuvered into the kettle through the hole in the side.  But ultimately successful, and we had no scorching with the new, lower watt density element.

Everything went well and we ended up with between 2.5 and 3 gallons of 16°P wort, which we topped up with boiled, filtered water to 4.5 gallons for a final gravity of 1.040.  After pitching the yeast we tossed the keg into our fermentation chamber (a modified Vissani 52 bottle wine fridge) set to 67°F for a one-week primary fermentation.  We then had to move it out to make room for our partigyle IPA and Pale, which we’ll talk about next time!

Extract American Amber Review

eamber-tastingTwo months ago we decided to jump back to our extract-brewing beginnings and see what kind of American Amber we could make.  We used amber malt syrup and gold malt extract for the base fermentables and some Crystal 10L and Amber malt for steeping grains.  We were pleasantly surprised by this one, although our expectations weren’t high to begin with…

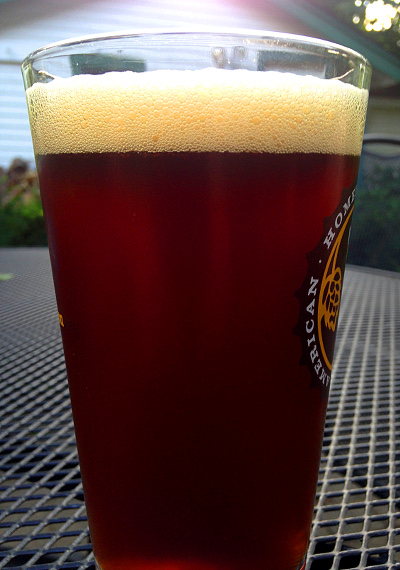
Appearance: great amber color and after 6 weeks in the keg, very clear when held up to light.  Pours with a medium-dense head that sticks around for a while and clings to the sides of the glass.

Smell: sweet malt and some citrus, but not overly malty.  Even with the dry-hops and right after carbonating, it didn’t have a huge hop aroma.  Which is fine, since this wasn’t intended to be a hop bomb.

Taste: very mellow, balanced bitterness from the hops backed by semi-sweet malt but no grainy flavors.  A bit muddled perhaps, with all the malt flavors blending into one another for a single malty note.  This is perhaps the only let-down of this brew.

Mouthfeel: possibly due to the amount of crystal malt used, this brew has just the right amount of body for a traditional amber beer.

Next time: since darker malt extracts often incorporate specialty grains already (in this case, C60L and Munich in addition to the pale base malt) and we added more steeping grains, there might have been a bit too much crystal malt in this beer.  Next time we would decrease the C10L by half, use pure Pilsen malt extract instead of Golden Light (which includes Carapils), and add some Aromatic malt for extra malty flavor.  This should result in a more drinkable beer without sacrificing much color or maltiness.  Also, we’ll use more dry-hops for a hoppier aroma right out of the tap.

Extract Throwback – American Amber

We last brewed an extract beer on December 5th, 2012, an English Bitter with left-over malt syrup and some year-old Munton’s yeast.  Since then we’ve brewed 45 all-grain batches on both our large and small electric breweries, some using up to 52lbs of grain, a hopback, fresh hops, first-wort hopping, whirlpooling, continuous hop additions, a pH meter and refractometer, sacks of imported base malts, and (almost) all the other brewing bling money can buy.

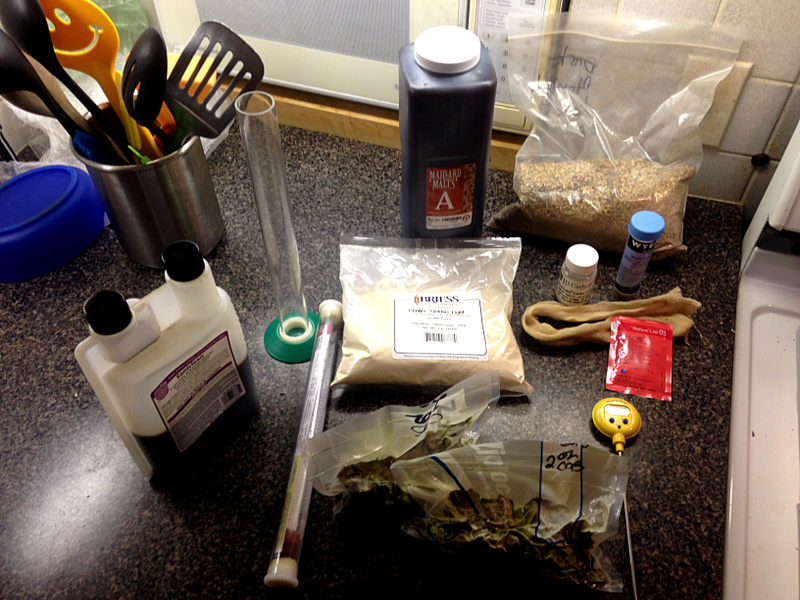
eamber-ingredientsWhy not go simple again and just brew a straight-up extract beer? Using nothing but what a beginning brewer would use?  Of course!

The Recipe

Name: American Amber (Extract)
Batch size: 5 gallons
Expected OG: 1.052
Expected FG: 1.012
Expected IBU: 30

6.0 lbs Amber malt syrup (1/2 late addition)
1.0 lb  Briess Golden Light dry malt extract (late addition)
1.0 lb  Briess C10L (steeping)
0.5 lb  Thomas Fawcett Amber (steeping)

2.0 oz Cascade (leaf) 3.2% AA @ 60m
1.0 oz Cascade (leaf) 3.2% AA @ 10m
       Whirlfloc              @ 10m
1.0 oz Cascade (leaf) 3.2% AA @  5m

1 pack Safale S-05 dry yeast

This is closely based off Northern Brewer’s American Amber recipe with substitutions for stuff we had on hand.  Instead of using two 3.15lb jugs of Amber malt extract ($10 each) we bought one 6lb jug ($18) and used a bag of DME we already had.  For steeping grains we used some Crystal 10L we had on hand instead of the 20L from the NB recipe, and we added a bit of Thomas Fawcett amber malt because there’s a bunch lying around and we haven’t used it in a while.

Next, we used some Cascade leaf hops that we bought for $1/oz a few weeks back from a guy who was selling them out of a cooler.  He didn’t know the exact alpha acid but said it was “in the low 3s” so we guessed 3.2% and called it a day.

We stuck to using only tools that extract brewers would typically have on-hand, which means no pH meter, no refractometer, no counter-flow chiller, no brewing salts, no yeast nutrient, no oxygenation, and no fermentation temperature control.

The Brew

eamber-steepingThe first step in a normal extract brewing process is to heat as much water as your stove can handle to about 150°F for steeping grains.  If your stove can do a full boil (~6.5 gallons) then great!  We haven’t yet found one that can, so we chose to do a partial boil of about 3 gallons.  Once it’s at steeping temperature, put your milled grain into a grain bag and drop it in, letting it steep for about half an hour.

eamber-maltThen pull the grain bag out, toss it into a colander, and press to get as much worty liquid out of it as you can.  Add that back to the kettle and heat it all up to a boil.  Once it’s boiling, add half of the malt extract, and then rest near the end just to sanitize it.  This is done because as the extract boils it darkens, so adding the rest of the extract at the end keeps the beer within the desired color range.  Late extract addition is more important for lighter colored beers like pilsners, lagers, and pale ales, but since we’re just following the recipe we’ll do it too.

Whenever adding extract, always turn off the heat and add it slowly, stirring constantly to avoid scorching the extract.  Since liquid extract is heavier than water, it will sink down to the bottom where all the heat is, caramelize, and possibly burn, making awful beer.

eamber-boilNow that the wort is boiling, add your hops according to the schedule.  If you’re using pellet hops you’ll definitely want a hop sock, but since we were using leaf hops we just threw them in and fished them out later with a strainer.

Once the boil is done the hot wort must be chilled down to yeast pitching temperature below 80°F and lower if you can.  So grab your immersion chiller (if you have one) and hook it up to your laundry sink or garden hose and chill away.  If you stir with a sanitized spoon it’ll chill faster and you won’t waste so much water.  If you’re doing a partial boil, one trick is to chill down to 80°F and then top up to 5 gallons with cold water, which should bring the temperature down below 70°F.  Then pitch your yeast.

After pitching make sure that the beer has cooled further down to 65°F within 8 or 12 hours by sticking it in a cool place like a basement or closet, or putting the carboy into an actively cooled fermentation chamber if you have one.  Letting the temperature stay too high can produce off-flavors, and fermentation actually raises the temperature a few degrees.  Keep it below 70°F; 66°F is even better.  Of course, this all depends on your specific yeast too.

We didn’t bother measuring the original gravity, since malt extracts have a well-known gravity potential and we were lazy.  The Amber malt syrup has a potential of 1.036 Points-Per-Gallon (per pound) and the dry extract has a potential of 1.043 PPG.  This adds up to (6lbs x 36) + (1lb x 43) = 259 total gravity points.  Divide that by 5 gallons and we get an Original Gravity of 1.052.  The steeping grains don’t contribute enough gravity points to count.

The Fermentation

mountmelick
Next up: Extract Irish Stout

We cheated a bit and fermented in a keg, which most extract brewers probably don’t do.  Our keg was filled close to the top, and since we were only using what a beginning extract brewer would use, we opted to skip Fermcap S for fermentation foam control.  This meant that we got some great blow-off after 2 days as yeast and krausen filled the air lock.  But that’s a good sign.


Simcoe IPA Tasting

tastingWe brewed this in late March and it’s almost gone, because people keep asking for growlers.  We’ll take that as a good sign.  It’s also entered in a competition, although in the ever-popular IPA category, and we’ll post an update if it wins anything.

Appearance: straw gold, very clear (ignore the picture, that’s the end of the keg).  IPAs are typically darker than this (which may cause a point deduction in the competition) but since Pilsner is the only malt in the beer, this is no surprise.  It pours with a one-finger head which quickly falls back to a thing ring around the top, which clings to the glass.

Smell: some said “grapefruit”, but we get some mango.  There is none of the supposedly typical Simcoe pine-tree or cat-urine.  We do smell the sweeter notes of Pilsner malt too, but overall, even with the dry-hops and higher carbonation (which carries the smell to your nose) we don’t get a ton of aroma.

Taste: Pilsner, like a Czech Pilsner.  And citrus.  Some said “grapefruit peel” and we do get a bit of that.  There’s a good initial bitterness but not overly agressive, dissolving into a mellow citrus-flavored finish.   All in all, a great easy-drinking summer beer.  We think it’s a bit too sweet due to only using the Pilsner malt, so next time we’ll be using it 50 or 60% 2-row.  No longer a SMASH, but hopefully a more balanced beer.

Mouthfeel: nicely balanced body, not thin at all.  It’s light enough to drink a couple pints but heavy enough that you know you’re drinking an IPA.  Nailed this, despite 0% crystal malt or Carapils, possibly due to the higher mash temperature (152°F) and higher carbonation.

Next time: we’ll probably use 40 to 60% 2-row (or maybe even Marris Otter) to cut down on the Pilsner sweetness to create a more “American” style beer.  We think the hop schedule worked extremely well, though we might add 1/4oz more 60 minute hops for a more aggressive start.  We Brewed It Right.

Simcoe/Pilsner SMASH IPA

Northern Brewer keeps having 20% off sales, so what are we supposed to do?  Clearly we’re supposed to buy expensive items like sacks of imported malt and 8lbs of PBW.  When you buy it in bulk, it’s already cheap.  When you buy it 20% off, it’s stupid cheap.

So after we bought a sack of Best Pilsen malt, we needed something brew.  We also have a lot of Simcoe hops lying around.  Why not a SMASH?  Doing a Single-Malt-And-Single-Hop beer lets you taste each ingredient by itself and experiment with hop schedules to determine the best amounts for bittering, flavor, and aroma.

The Recipe

Name: Simcoe/Pilsner SMASH IPA
Batch size: 5 gallons
Expected OG: 1.065 (75% efficiency)
Expected FG: 1.016
Expected IBU: 85 (60 boil, 25 whirlpool)
Mash: 90m @ 152°F

 12.5 lbs Best Maltz Pilsner malt

  0.7 g canning salt (mash addition)
  1.8 g pickling lime (mash addition)

  1.0 oz Simcoe 12.7%AA @ 60m
  1.0 oz Simcoe 12.7%AA @ 10m
         Whirlfloc & yeast nutrient @ 10m
  2.0 oz Simcoe 12.7%AA @ 0m
         Whirlpool 20m @ 180°F
  1.0 oz Simcoe 127.7%AA dry-hop 5 days
 
1 pack Safale S-05 dry yeast

Simple, right?  Just one malt to measure out and one kind of hop to find in the freezer.  Buying them in bulk saves money too.

Obviously, the only brew-day variables you can change are mash temperature and hop schedule.  Since there’s only one kind of malt, you can experiment with hop additions to figure out how much bitterness, flavor, and aroma you get at different times without malts getting in the way.  For example, how much harsher bitterness do you get when you add 75% of the IBUs in the first addition?  How much flavor do you get from a whirlpool addition for 10 minutes versus 20 minutes?  That kind of thing.

BU:GU

On the subject of bitterness, there’s a concept in brewing called the Bitterness Unit (BU) to Gravity Unit (GU) ratio, which expresses the bitterness and maltiness of common styles of beer.  Hoppier beers are typically 1.0 or higher while malt-forward beers are less than 1.0.  For example, an aggressive American IPA with an IBU of 75 and an original gravity of 1.065 has a BU:GU ratio of 75:65, or 1.2.  A typical Oktoberfest with an IBU of 25 and an OG of 1.055 has a BU:GU ratio of 25:55, or 0.45.  Thus the BU:GU ratio is one number that gives you an idea of how hop-forward or malt-forward a specific beer is.

But not all IBUs are created equal, especially when whirlpooling gets involved.  An app or an IBU calculator always gives you an estimated IBU, but you still need to play around with the recipe to get the right balance of punch vs. flavor.  For example, this SMASH recipe has an estimated IBU of 85 (from the Brewer’s Friend app) but it has nowhere near the punch of a Stone Delicious IPA with 80 IBUs.  We’ve found that the IBUs that are attributed to the whirlpool seem to be less “bitter”.

Whirlpools

Different hop compounds isomerize (that is, rearrange their chemical structure to become soluble in water) at different temperatures. The acids which create bitterness must be boiled to isomerize, but boiling drives off more volatile compounds that typically contribute flavor and aroma, which isomerize at lower temperatures.  A temperature-controlled whirlpool strikes the right balance between boil, time, and possible infection, extracting as much flavor and aroma from the hops as you need.  Experimenting with multiple temperature steps and hop additions can achieve some unique flavors you won’t find elsewhere.

Since we’re trying to keep this IPA simple we chose a single whirlpool temperature of 180°F and a single whirlpool hop addition.

The Brew

Prior to the mash, we’re experimenting with higher strike temperatures than normal since our mash tun looses a significant amount of heat when transferring strike water despite Reflectix insulation.  The Brewer’s Friend app we use usually estimates our strike water temperature around 165°F, but we’ve found this causes too low of a mash-in temperature.  This time we heated our strike water to 180°F which dropped to 168°F in the mash tun.  After adding the grain the mash temperature dropped to 156°F which was still too high.  So we over-compensated with a cold water addition and ended up at 150°F, slightly lower than we hoped for.  Next time we’ll lower our strike water temperature slightly, and manage any cold water additions better so that we hit our mash temperatures dead-on.

Since the grain bill contained no roasted or crystal grains, our mash pH started too high at pH 5.6.  We adjusted with lactic acid to drop into the optimal range of 5.2 to 5.4 relative to mash temperature.

The sparging process yielded 8 gallons at 11° Plato (1.044), so we boiled off about 1 gallon to end up on target with 7 gallons at 12.5° Plato (1.051).  Then we started the boil clock and added our bittering hop addition.  Our boil ended an hour later almost on target at 15.5° Plato (1.063), whereupon we added our 0m/whirlpool hop addition recirculated through our counterflow chiller until the temperature dropped to 180°F.  After setting the boil kettle PID’s temperature to 180°F we let the whirlpool circulate for 20 minutes.

The Fermentation

Fermentation was uneventful.  Unlike many of our experiences with Wyeast 1469 (East Yorkshire) the Safale S-05 yeast we used for this brew did not blow out the airlock.  After two weeks in primary, we kegged almost 5 gallons of 1.014 beer for an ABV of 6.4%.  The hydrometer samples exhibited floral flavors but not much bitterness, and almost none of the pine tree and cat pee notes that are characteristic of Simcoe hops.  We hope dry-hopping will bring more of that out.

For dry-hopping we use a stainless canister designed for kegs (like this one) to contain the pellet hops, which is quite easy to remove once the desired level of dry-hopping is achieved.  Multiple dry-hop additions are also easy without fear of contamination.  This gets dropped into the serving keg before racking the beer from primary.

Will it taste like an over-hopped Czech Pilsner?  We’ll find out soon enough…

Beer in the Czech Republic 2015

This year on our annual trip to Brno in the Czech Republic, we were impressed by the rising beer scene for two reasons.  First, we noticed more new micro-breweries on tap in pubs, and second a lot of the micro brews aren’t Czech pilsners.

For example, Pivovar Lucky Bastard was mere blocks from our hotel, and while we couldn’t get away from meetings to visit the brewery during its small, small bottle sales window (11 – 4 on Tuesday), we did sample their Dubbel at Ochutnávková pivnice.  We also had a stout from Pivovar Kocour Varnsdorf, an American IPA from Pivovar Nomád, a DIPA from Pivovar Slavkovsky, and an English IPA from Beskydsky Pivovárek.  And as always, classic Czech Pilsner of all varieties.

Next year we hope to see even more variety, and even more pubs serving even more kinds of beer.  It can only get better, right?

Bonus Pumpkin

bonus-mashing
High-tech mash tun

With Pumpkin #2 our efficiency was good enough to produce 5.5 gallons of additional runnings at 4°P (1.020) when we drained the mash tun before cleaning it out.  We thought it would be a shame to waste all that wort, so we didn’t.  We brewed a bonus beer instead.

A bonus beer is great way to use up small amounts of specialty grains and hops you have lying around.  You can’t accurately reproduce the recipe, so it’s like a free batch of no-pressure, OG-be-damned beer that you were just going to dump down the drain anyway.  Plus, it can mash while you’re boiling and chilling the parent beer, so all it takes is another hour.  Why not?

The Recipe

Name: Bonus Pumpkin
Batch size: 5 gallons
Expected OG: ~1.040
Expected FG: 1.012
Expected IBU: ?
Mash: 60m @ 130°F + 15m @ 152°F

 5.5 gal 1.020 wort from Pumpkin #2
 2.5 lbs Briess 2-row
   8 oz  Briess Victory
   8 oz  Muntons C60L
   4 oz  UK C150L
   4 oz  Belgian Aromatic

 1.0 oz Northdown 7.9% AA @ 45m
 0.7 oz Northdown 7.9% AA @ 20m
 1.0 oz Northdown 7.9% AA @ 10m
 1.0 oz Northdown 7.9% AA @  5m

1 pack Safale S-04 yeast

The Brew

We scrounged up some Victory, C150, and 2-year old Briess 2-row from our malt library, milled it, and tossed it into large grain bag.  The bag was then placed into a bucket with the final runnings from Pumpkin #2.  Because all the enzymes from the original mash were denatured due to mashout and the final runnings were well below the target mash temp of 148°F, we added some amylase enzyme to help conversion along.  We also attempted to top up with boiling water to move closer to normal mash temps, but couldn’t get much higher than 135°F due to lack of space in the bucket.

To compensate we dumped the contents of the bucket into the boil kettle on top of the left-over hot break and trub from Pumpkin #2.  Then we added the grain bag, set the PID for 152°F, and recirculated for 15 minutes to attempt more complete conversion.  After squeezing out the grain bag as much as we could, we got about 6 gallons of 9°P (1.036) wort.

We then proceeded with a slightly abbreviated 45 minute boil since it was already late.  We kegged 4.75 gallons of 10.5°P (1.042) wort, sprinkled on some S-04 yeast, and cleaned up.  Fermentation proceeded normally at 65°F and two weeks later we had 4.5 gallons of 1.010 beer for an ABV of 4.2%.

The Evaluation

bonus-glassThe beer is a nice amber color and quite clear.  It pours with a nice foamy head that soon settles back but leaves a nice ring of foam on the outside.  The smell is mostly spicy malt with no fruity or flowery notes.  Taste is initially malty which quickly fades to a slight sweetness with a hint of spice, but overall a drier beer.  And as you’d expect with a 1.010 beer, mouthfeel is thin but countered somewhat by a higher carbonation level.

We’re surprised with how well this one turned out, since we weren’t expecting much from a bunch of old malt and some second runnings.  But we got a pretty good beer with just a bit more work.  Bonus!