 Last year we brewed a wet hop IPA with hops we picked from some friends. For reasons we’ll talk about later, it didn’t turn out that well. But we had enough fun picking the hops that we thought we’d plant our own this year.
Nobody except hop breeders grow hops from seed. Instead you buy rhizomes, which are short pieces of hop root from which the hop vines (actually called bines) will grow. Rhizomes can typically be pre-ordered in February, are cut from existing hop plants around late March or early April, and shipped to your door in an opaque, sandwich-sized bag. They must be kept cool and moist until the ground is thawed enough to dig, but late enough that the hop shoots won’t get hit with too much frost.
Planting
Hops grow quickly and often take over whatever structure or plant they are near. But they also spread quickly underground too, expanding their root system through the rhizome. Since the hop vines can grow at any point along the root system, it’s common for new shoots to pop up far away from where the original plant is established. Most people seem to just mow them off or remove them. To us, that seemed like a lot of work over many years, and we’d rather do a lot of work once and never again.
 Instead you can buy “rhizome barrier”, which is thick flexible rolled plastic typically used for bamboo, another plant that spreads vigorously through rhizomes. This should be buried 18 inches below the surface around the entire area where your hops will be growing, with a few inches left above to ensure the hop roots don’t jump over the top. When the roots hit the rhizome barrier they have nowhere else to go. Simple!
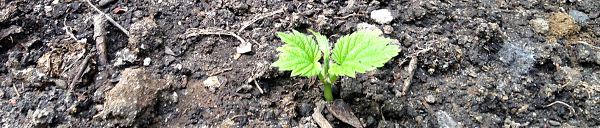
Hop rhizomes should be planted 1 or 2 inches deep in a hole filled with compost or soil mixed with slow-release fertilizers. Don’t over-do it on the fertilizer since you can always add more later, but tons of compost is fine. Hop rhizomes actually have a “top” side, but if you’re not sure which side is which, planting them horizontally is fine too.
Growing
 Hops require lots of nutrients and water, but if you’re fertilizing them it’s easy to use the wrong mix or the right mix at the wrong time. It’s also easy to over-water them, so make sure they are planted in an area with good drainage. Short, frequent watering is better to ensure the soil doesn’t stay too wet. But you can’t go wrong adding more compost around the plant, especially after harvest, and mulching is a great option to conserve water and keep weeds away.
Once you have shoots about a foot long, choose the strongest two or three and clip the rest. While it may seem like you’re going to kill the plant, you won’t. Selecting the the best shoots lets the plant concentrate its energy towards growing hop cones instead of growing hop bines. Train the shoots up a trellis or hop coir (thick twine) to a rope strung between poles, though any high anchor point like the side of a building will do. If you don’t have poles you can grow them horizontally along a fence too.
 At some point they stop growing up, and start growing out by creating “sidearms” from the branch of the leaves and the main vine. These are where the hop flowers will actually grow instead of on the main vine. When the sidearms get long enough you’ll need to make sure they have somewhere to grow too, by either training them up the main bine or letting them attach to a trellis if you have one.
Harvesting
 Sometime in August or early September, depending on your climate, the cones that grow from the hop flowers will be ready to harvest. Since this is nature, different parts of the same plant and even different plants might be ready to harvest at different times, so you need to monitor their progress. When the hop cones have a papery feel, when they spring back to shape when you press them, and when they have that great hop aroma when you crush them by rolling them around in your hands, they are ready to pick. You can also cut one in half vertically with a sharp knife and look for the lupulin glands in the middle of the hop; if they are abundant and bright yellow, it’s probably ready.
After picking you must either use the hops within 24 hours or dry them. Hops will oxidize, spoil, rot, and mold if left too long, so if you can pick them and immediately toss them into boiling wort you’re doing it right. But if you want to dry them for later use, putting the hops onto a window screens on top of box fans will do the job after a few days, provided you turn the hops periodically.
After the harvest you can cut the hop bines near the base and discard the bines and leaves. Don’t compost them if they had any kind of disease. Then cover the base of the hop with some compost and mulch, and leave for next year!