My brother-in-law’s birthday was coming up, and this year he’s been into Randalls. So I figured why not build one, I know there are plans out there. You can even buy them on eBay, but how much fun is that? Rhetorical question; it’s not fun. What is fun is building it yourself.
Unfortunately, while researching this, nobody said where they got the internal filter tube. I need links, people! So I’ll do the Internet a service and post actual links to stuff I bought. So if you really want to make a Randall just like mine, it’ll be dead-simple. You’re welcome.
First, the criteria. The filter tube must be sanitary, high-polish 304 or 316 stainless steel. Some people use PVC, but ewwww. Second, it’s got to have easy keg connects, which means MFL fittings onto which I can screw all the kegging stuff I already have.
The Parts
1 x 1/4" NPT Cartridge filter housing
1 x No. 2 solid stopper (NB SS2)
2 x 1/4" MFL to 1/4" MPT
1 x Teflon plumber's tape
1 x 50-pack AS568A Dash 206 Silicone O-Ring (McMaster 9396K208)
1 x Sanitary Stainless Steel Tube 3/4" OD .62" ID (McMaster 4466K731)
The Tools
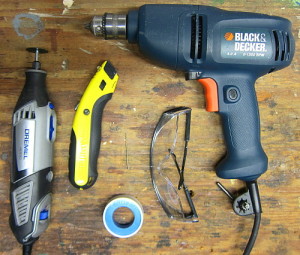 Dremel with re-inforced cutoff wheel and grinder, drill, 1/8″ bit, utility knife, safety glasses, Teflon tape, and a hacksaw (not pictured).
A Brief Word on Stainless Tubing
If you’re observant you’ll note I bought my internal filter/dip tube from McMaster Carr because they’re awesome, not because they’re cheap. I couldn’t find cheap stainless high-polish tubes on the Internet, despite lots of searching. I really tried. McMaster’s tubing is high-polish but it’s also 0.065″ wall which is really hard to drill with small bits. More on this later.
Step 1: Put a hole in a box
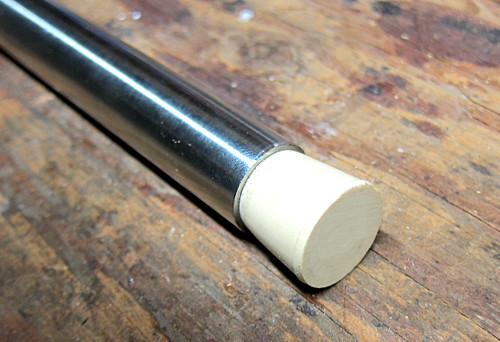
 Actually, first you want to cut the #2 solid stopper in half. The solid stopper (rather than a drilled one) forms a better seal at the bottom of the filter housing and helps keep the filter tube in place, as you’ll see later. Discard the large end, and shave down the edges of of the small end so it fits very snugly in the end of your stainless tube. When inserted in the filter housing, the stopped will keep the tube upright and stable while you screw on the filter’s cap.
Step 2: Measure and cut your tube
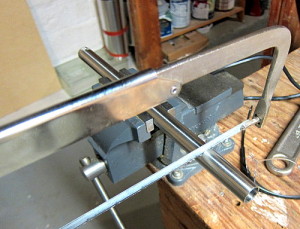 This is really the only hard part; you really don’t want to cut it too short, or it won’t seal right. And obviously you can’t cut it too long, or the cap can’t seal. If you’re using the same filter I am, then a length of 9 5/16″ is about right. 9 3/8″ isn’t going to kill you though. If you just cut this length, fine, don’t blame me if it doesn’t work. Make sure it’s the right length first, by cutting longer than you need, checking, and then recutting if you need to. You don’t want to F this up or you’re out $15.
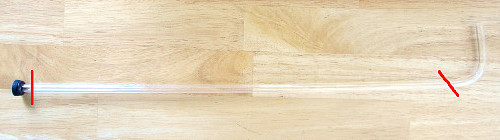
Step 3: Taper your tube
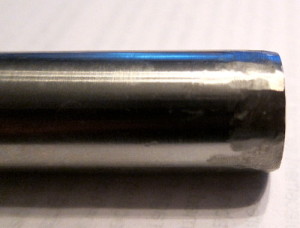 The listed cartridge filter outlet at the top of the cap isn’t quite 3/4″ in diameter, so you’ll want to taper one end of the stainless tube to make sure it fits into the hole in the filter cap. You can do this with either a Dremmel or a metal file, but either way, just keep filing it down all around the end of the tube until it fits snuggly into the filter head. Remember to put a silicon O-Ring in the filter cap first, which forms the top seal.
Step 4: Drill like a Boss
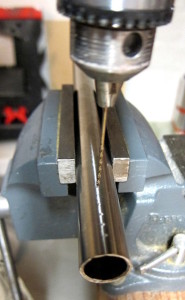 Here’s where you make the Randall a Randall. You want to drill a bunch of 1/8″ holes in the opposite end of the stainless tube from the taper you just made. This is the end that sits at the bottom of the filter and sucks up all the hoppy goodness that your Randall was born to provide. Just drill some holes. You can drill as many or as few as you like, and in whatever pattern you like. Drill baby drill! Show your true colors.
I drilled two rows 90 degrees apart, all the way through, from 1/4″ to 2 1/2″ from the bottom of the pipe. You’re drilling at the bottom (where the stopper will be) because the beer flows from the top of the filter, through the hops, and down to the bottom of the filter where the holes in your stainless tube filter out any large particles and finally channel the beer out of the filter and into your tap.
When you’re done, grind out all the burrs and make sure both the inside and outside of the tube are smooth. Use a file or a Dremmel or sandpaper or whatever you want. But you really don’t want metal filings in your beer.
Step 5: Fit like a Boss
Now you get to wrap the MPT ends of your MFL/MPT fittings in Teflon tape, and carefully screw them into the filter cap. Remember, the cap is plastic, so you don’t want to screw them down too hard and split the cap or strip the threads. Screw them finger-tight, and then use a crescent wrench to turn them about one or two more turns until they are snug.
Step 6: Put it all together
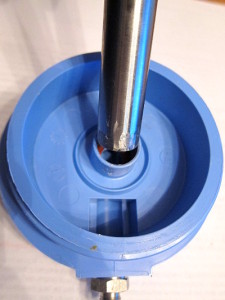

Insert the half-stopper into the bottom of the stainless tube, at the same end your drilled the holes. Then put one of the silicone O-Rings into the center hole of the filter cap. Insert the tapered end of the stainless tube into the filter cap, and then carefully screw the filter cap down onto the filter, making sure the rubber stopper end seats correctly into the bottom of the filter. Guess what? You’ve got a Randall.
Using your Randall
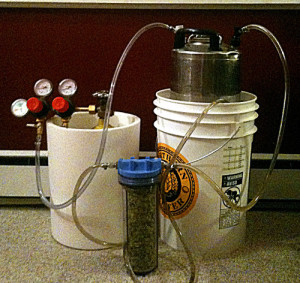 So you’re going to a party and bringing your kegs and your Randall because you’re the Guy with the Beer. How do you use this thing? Well, you hook CO2 up to your keg, then you hook your beverage out line to the Randall’s “in” side. Then you hook your tap up to the Randall’s “out” side.
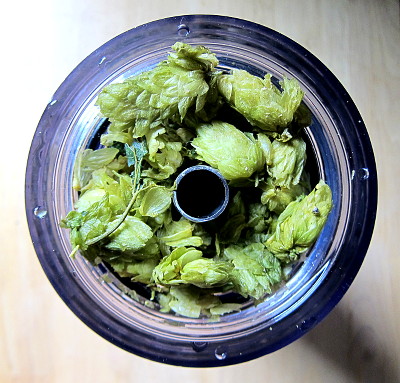
Next up, what to put inside? Leap hops, clearly. Never ever use pellets. But think outside the box here. Grapefruit. Bell peppers. Cherries. Hot peppers. Vanilla beans. But if you ever do hops, I have some advice; soak them in water overnight first, otherwise you’re going to taste bitter grass all night and nobody will drink your beer. The AA of your hops won’t really matter much, what you’re getting out of your hops are the aroma and flavor chemicals. Remember, if something doesn’t taste good, you can always take it out and put something else in, even in the middle of the keg.
So there you go. Randall hard, my friends!