Category Archives: Not Beer

Vent Times Two

When building the original Brew It Right™ brewery, the only viable vent option was out the glass-block window behind the brew bench.  Time for Q&A:

How you do you vent out a glass block window?

Basement_pan_frame_vented_Frazier1

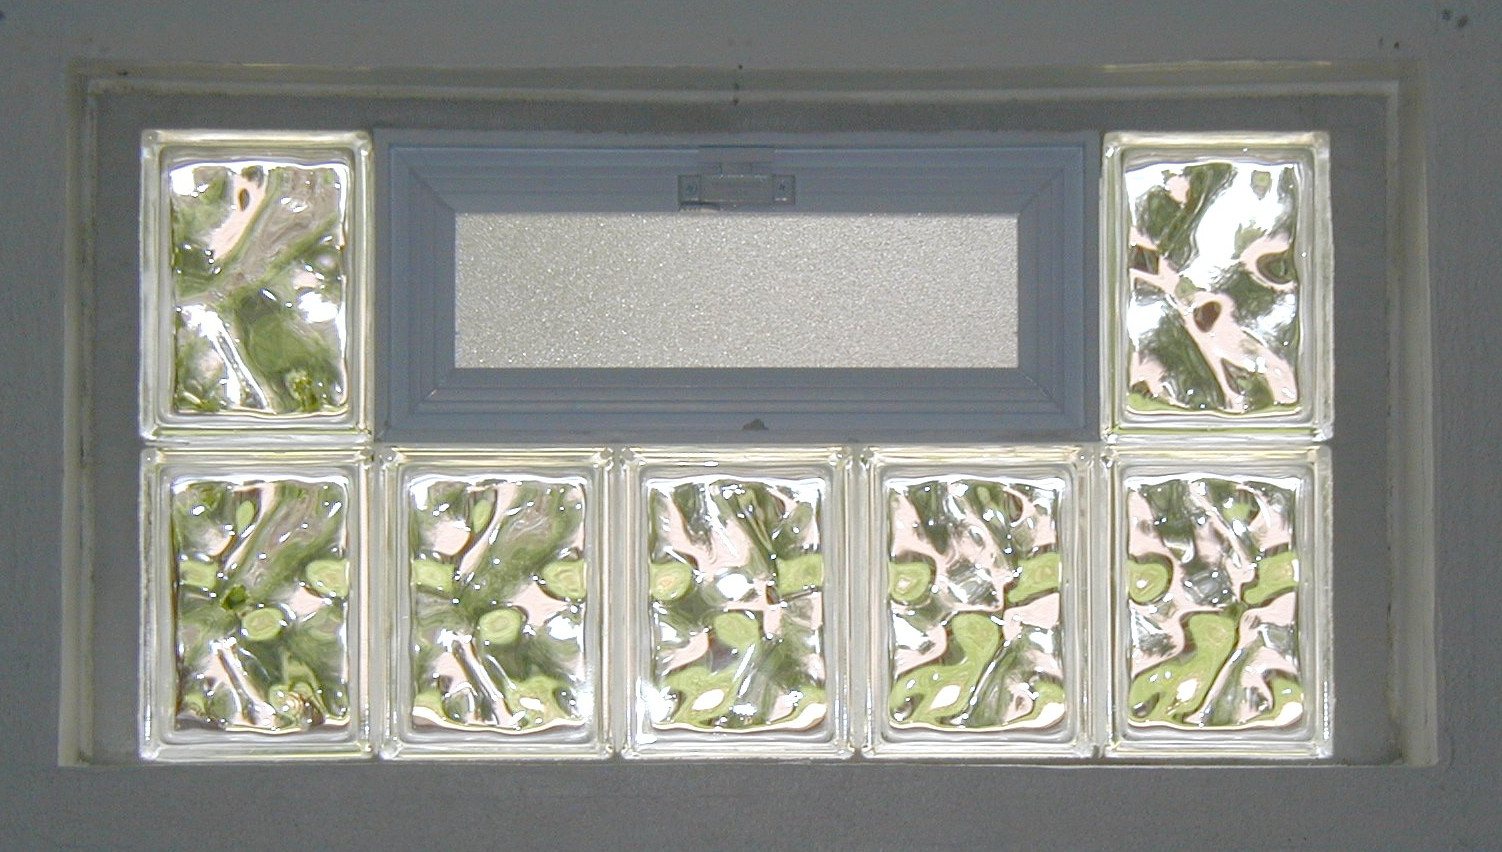
You start with a window that looks like this.  Notice how the blocks beside the pull-down vent are not square; this prevents using 6″ PVC drain pipe because the blocks are less than 6″ wide.  So you have to use 4″ PVC drain pipe instead, which means you buy a 105mm diamond grit hole saw to cut through the blocks.  Yes, there was a $25-off coupon the day I bought it.  Yes, it was still stupidly expensive.  But here at Brew It Right™ we also Do It Right.

Hot tip: buy the Bosch mandrel so you don’t walk all over the glass when you’re starting your cut, otherwise you’ll end up with some modern glass block art that looks nothing like a 4″ hole.

Aren’t there two sides to each glass block?

You’re entirely correct!  It’s like cutting tile, only it’s thicker and takes 5 times longer to cut!  Each side is about a half-inch thick, and it takes a really, really long time to drill through.  Worse yet, you have to make sure that the outside hole is slightly lower than the inside one, so that any condensation that makes it through the fan trickles down to the vent, not back into the fan.

Hot tip #2: spray the cut with water periodically to reduce heat and friction.

Wait, isn’t 105mm smaller than the outer diameter of 4″ PVC drain pipe?

Correct again!  Unfortunately, diamond grit hole saws larger than 105mm are insanely expensive.  We don’t do it that right here at Brew It Right™ ’cause damn, we’re not rich.  So instead, cut a 105mm hole and then use a $5 grinding bit on the end of a drill until the 4″ drain pipe fits.  Then silicone seal to weatherize and fill in the gaps.

Two fans are better than one

basic-vent
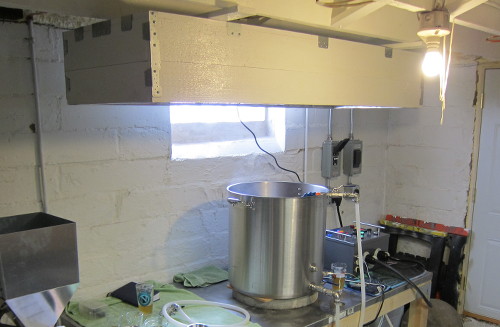
The original plan called for a single ActiveAir ACDF6 in-line fan hooked up to a 6″->4″ PVC reducer, then vented out the glass block window.  Unfortunately, the 6″ fan doesn’t pull out enough steam to handle a full boil.  Brew It Right™ has no idea why this is the case; perhaps it has something to do with back-pressure created by the reducer which kills the CFMs.  The vent itself closely follows Kal’s dimensions for his custom condensate hood, including the size (about 11″ tall) and height above the boil kettle (16″), so it seems like the fan and reducer are the problem.

Clearly a second fan is in order; Brew It Right™ purchased a 4″ in-line ActiveAir fan and installed on the opposite side of the glass block window.  Obviously this entailed using the diamond grit hole saw a second time, which nobody here was particularly enthusiastic about due to the time required and bodily contortions involved.

vent-hole
A Tale of Two Vents – Before
A Tale of Two Vents - After
A Tale of Two Vents – After

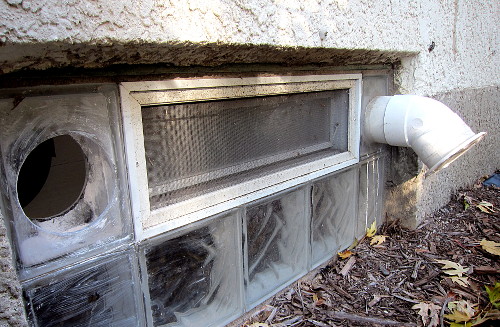
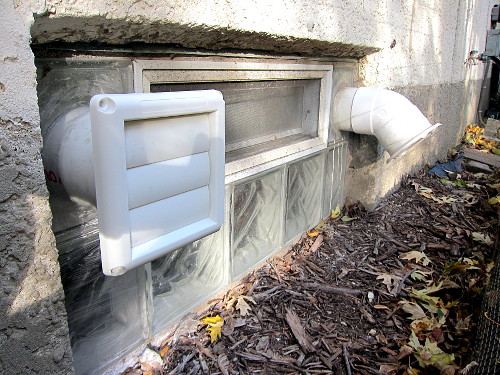
Keen observers will note that a different exterior vent is used on the new fan.  The original cover was a spring-loaded flush exterior vent, but it turns out the spring isn’t very strong and you have to go outside to make sure it closes every time you use it.  It’s cold here in the winter, so that’s not very fun.  Thus the standard dryer vent cover on the new vent, a product of trying and half-failing the first time around.

Inside, the new fan was mounted to a bady-cut cut hole in the vent using a Dremel 4000 with a router bit, since there wasn’t enough space for the jigsaw used for the original 6″ fan hole.  Then, 4″ PVC drain pipe was slid through the hole and over the fan outlet, and a standard clothes dryer vent attached to the end of the drain pipe with silicone.

final-vent-inside

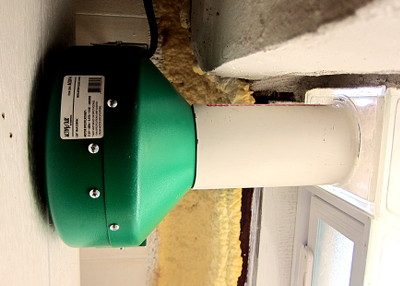
The fan was then secured to the ceiling using thick metal bars to ensure it didn’t vibrate itself out of place.  While we haven’t brewed with it yet, we’re confident it will provide the CFM boost required to pull out the extra moisture that the 6″ fan cannot.  Updates to come on how it works out…

Fuller’s London Porter and Cider Updates

Refractometer Crash Course

We’ve got two fermenters to check.  But we don’t want to pull a whole hydrometer sample for either of them.  What to do?  Use a refractometer!

New Toy!!!
Brew It Right’s latest new toy!

Since a refractometer takes a few drops of sample at a time, it’s trivially easy to measure fermentation progress.  But remember, they are calibrated for water not alcohol, so after fermentation starts you need a calculator to get the correct gravity.  Also, refractometers typically measure in Brix, a scale normally used for wine.  So until you’re comfortable with readings in Brix (or the practically equivalent Plato scale), you’ll want to convert between Brix and Specific Gravity using a different calculator.  Yay Internet!  So many useful calculators!

A refractometer works by measuring how light changes when is passes through a liquid.  Plain water bends light differently than does a solution full of sugar or a solution of sugar and alcohol.  By looking at how much that light bends, you can measure how much sugar is in solution.  Distilled water should always show a Brix/Plato value of 0 (1.000 SG), while unfermented wort typically starts anywhere from 10 (1.040 SG) to 20 (1.083 SG) depending on the beer.

Since the sample is so small, a refractometer is also extremely useful while fly sparging, to ensure gravity doesn’t fall below the magic 1.010 where tannin extraction might occur.  The two or three drops required for the refractometer cool within seconds, as opposed to 5 or 10 minutes for a full hydrometer sample in an un-agitated water bath.

So, fill a bowl with water, add your favorite sanitizer (StarSan or Saniclean), and sterilize your pipette.  Be sure to suck some sanitizer into the pipette and squeeze it out too, instead of just sanitizing the outside.  Next, open your fermenter and suck up a few samples and squeeze them into a glass.  Do this until you have enough for a taste.  Then, use the pipette to cover the prism of the refractometer with beer,and flip the sample plate down.  Hold the refractometer up to the light, look through it, and note where the color change occurs on the scale.  That’s your reading in Brix.

Teh Porter

It’s been two weeks since the porter was brewed, so how’s it doing?  Well, airlock bubbles have slowed to about 30 seconds-per-bubble, but as everyone knows that’s not a reliable indicator of anything.  But gravity is!  So using our trusty refractometer [ed – how trusty can it be already if it’s so new?] we pipette out a sample and measure it: 9 Brix, about 1.019 SG.

Huh, that seems pretty high, since we were expecting around 1.014.  There could be a few things going on here; first, the yeast (Wyeast 1968 London ESB) only attenuates 67 – 71%.  Second, we may have overshot the mash temperatures a bit, resulting in a less-fermentable wort.  Third, the grain bill may simply be less fermentable, and indeed, reviews of the brown malt I purchased from Northern Brewer indicate this: “Be warned, however, that this malt produces a poorly attenuating wort unless you use it in moderation and mash at a slightly low temperature.”  Oh well, the sample still tastes great!

Tomorrow I’ll try to rouse the yeast with a large sanitized spoon, but we may be near the end on this one.  Last resort: pitch some WLP007 Dry English Ale yeast and hope the alcohol shock doesn’t kill them all.

Teh Cider

In the other corner, the cider is still chugging away.  It’s been fermenting for a month, which is pretty common for a cider.  Last week I measured 7 Brix (1.014) and this week it’s at 6 Brix (1.006), with bubbles still about 8 seconds apart.  The sample has a ton of apple character, but is somewhat thin due to the lack of residual sugar.  It seems my strategy of using a low-attenuating/low-alcohol tolerant yeast (WLP002) to retain some sugar just isn’t going to work…

So we’ll sit on this one for a while, at least until the gravity sample stays unchanged for a few days and the airlock activity is slower.  Then we bottle!

Tis the Season for Organic Hard Cider

Hey, it’s Fall, and how better to ring in the new season (short as it is) than make some hard cider?

So Saturday found me using one of these to help press 8 or 9 bushels of organic apples into delicious, juicy cider.  We had a great operation going with two people washing and cleaning the apples, and two working the cider press.  Lo and behold, sure enough, out came 20 gallons of liquid gold.  For my toils I took home 5 gallons, which I promptly pasteurized at 170F for 30 minutes, cooled, and pitched.

While I’ve brewed a bunch of beer in my time, cider is all new to me.  Research indicates that I want to reduce spoilage potential by charging up my initial 1.046 OG.  So I added 10oz of corn sugar and 1/2 cup organic dark brown sugar, for a final OG of 1.056.

Next, since the sugars in cider are much simpler than wort, we expect the cider to ferment out completely, yielding a very dry end product.  There are ways to stop yeast activity (chemical bombing, cold-crashing, bottle pasteurization) but they all seem either not-organic, require fridge space, or involve shards of glass.  So my hail-Mary pass is to use WLP002 yeast, which is known to (a) attenuate badly and (b) dislike alcohol.  Hopefully it’ll drop early and leave some residual sugar around so I don’t end up with apple-flavored rocket fuel.

It’s now at 68F in my fermentation chamber, where it’ll stay for a couple weeks, then get bottled with some priming sugar and sit around for another few weeks.  Then bottoms up!