Pumpkin

pumpkin-junk
Leftovers

We whipped up our first pumpkin ale back in September when pumpkins were new and the world was young.  It went over so well we barely got any ourselves.  Now we have to rebrew it.  We went for something much more subtle than Pumking but still clearly a spiced pumpkin beer.  Our base recipe was an amber ale inspired by nothing in particular except a lust for sweet malty goodness and a bit of spice.

The Recipe

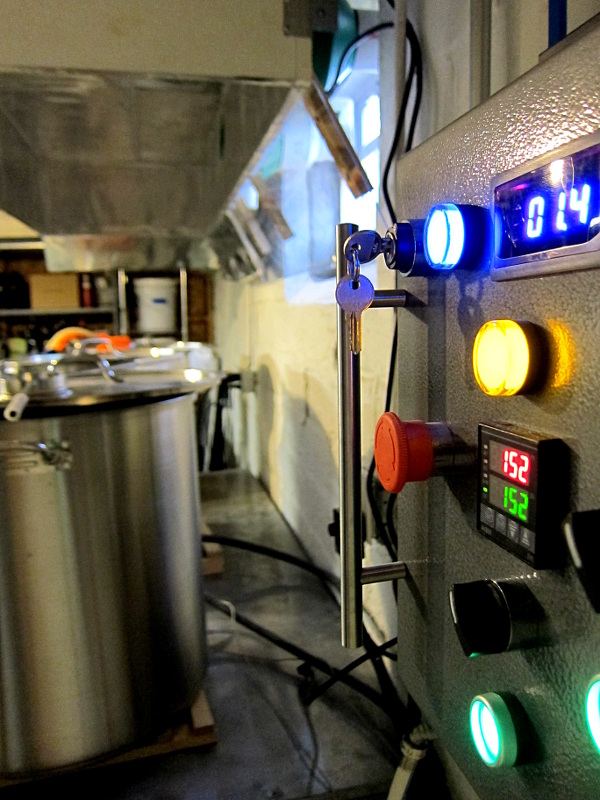
Name: Pumpkin #2
Batch size: 5 gallons
Expected OG: 1.065 (75% efficiency)
Expected FG: 1.016
Expected IBU: 45
Mash: 90m @ 152°F

 9.0 lbs Rahr 2-Row
 2.5 lbs Weyermann Dark Munich 10L
   8 oz  Briess Light Munich 7L
   8 oz  Briess Victory
   8 oz  Muntons C60L
   8 oz  Briess C120L
   6 oz  Belgian aromatic
   6 oz  rice hulls (not milled)
   3     pie pumpkins (8.3 lbs before roasting)

   1 oz  Northdown   7.9%AA @ 60m
   1 oz  Willamette  4.7%AA @ 15m
   1 oz  Willamette  4.7%AA @ 10m
 1/2 tsp cinnamon           @ 10m
 1/4 tsp ginger             @ 10m
 1/8 tsp nutmeg             @ 10m
 1/8 tsp allspice           @ 10m
   1 oz  Willamette  6.5%AA @  5m

1 pack Wyeast 1217 Northwest Ale

The astute among you may recognize the spice schedule as coming from Jamil Zainasheff and John Palmer’s Brewing Classic Styles.  Jamil recommends tossing half the spices into the boil kettle and the other half into the fermentor if needed, but we found adding all the spices to the boil gave just the subtle hint of spice we were looking for.

The Brew

pumpkin-pre
Magic goodness

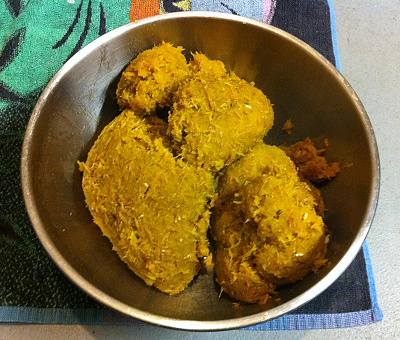
While it doesn’t look very appetizing, these are pumpkin bits and they go right in the mash.  Each pumpkin gets cut in half, seeds scraped out, placed cut-side-up on a baking sheet, and receives about a tablespoon of dark brown sugar in the middle.  After 1 1/2 hours of roasting at 325°F, drain the brown sugar liquid pumpkin nectar from each half into a bowl and save for later.  Then flip each pumpkin half over and roast another hour until soft all the way though.  Scrape out the pulp, discard the skins (see above), and dump the pumpkin into the mash with the grain.

pumpkin-mashin
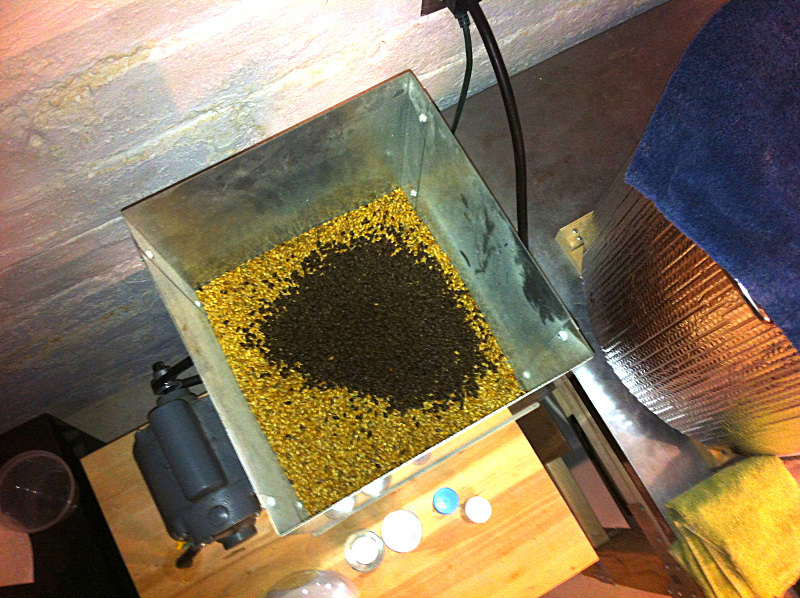
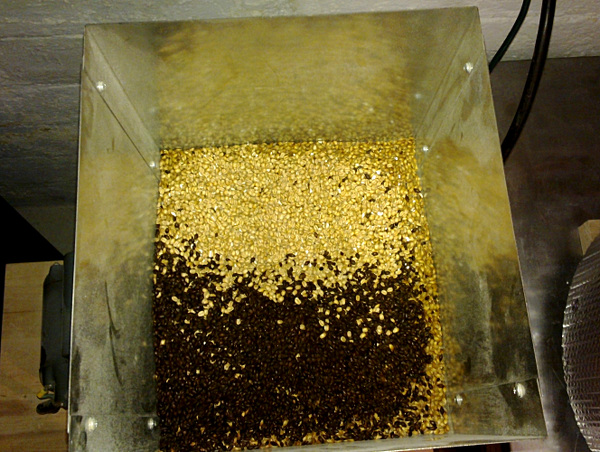
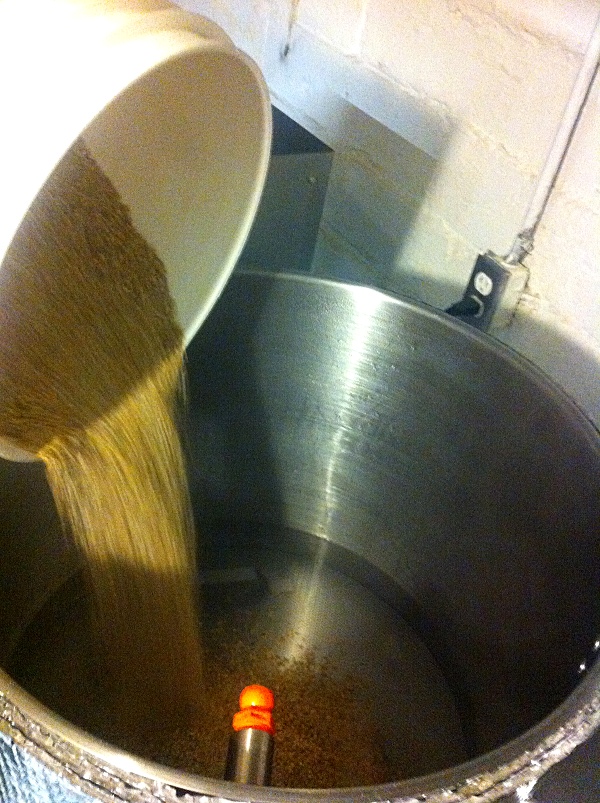
Because pumpkin isn’t as granular as malt, you’ll need some rice hulls to prevent stuck sparges.  These help buoy the grain bed in the mash tun, forming a filter to catch pumpkin and other particles before they clog the mash screen.

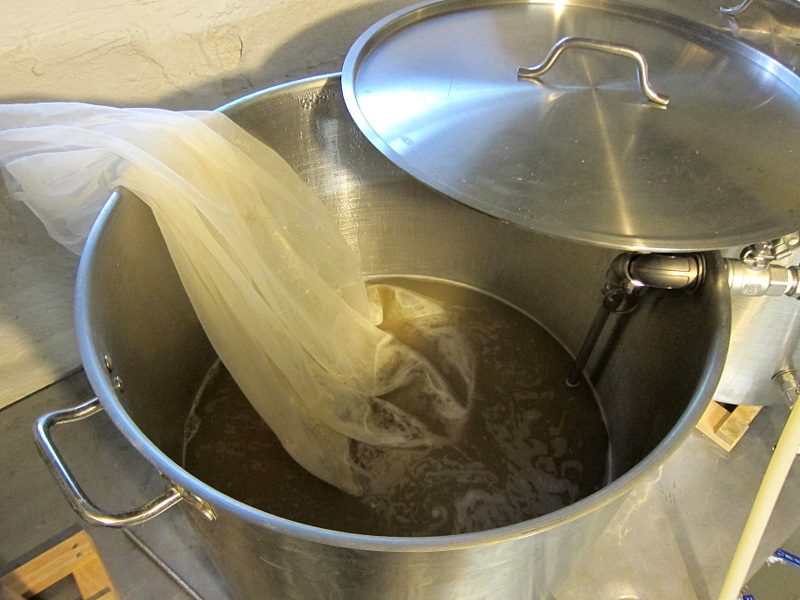
(The first time we brewed this recipe we used the Brew-In-A-Bag (BIAB) method with the pumpkin and the grains in separate bags, and it worked fine.  If you don’t have a 3-vessel setup, then BIAB will definitely work too.)

Pumpkin doesn’t contribute many fermentables to beer, so don’t expect a big gravity increase.  All you get is a small amount of flavor and bit of mouthfeel, with most of the flavor coming from the spices and the malt.  This means the beer needs to be excellent without the pumpkin, since you don’t have much to hide behind if the recipe is weak.  The pumpkin and spice enhance the recipe instead of taking the place of anything else.

pumpkin-bitsAfter mashing in the pH dropped way low (5.05) so we corrected with 1/2 tsp baking soda to bring it back up around 5.25.  Odd, since there aren’t many dark grains like chocolate, roast barley, or black malt, which are the usual pH-reducing culprits.

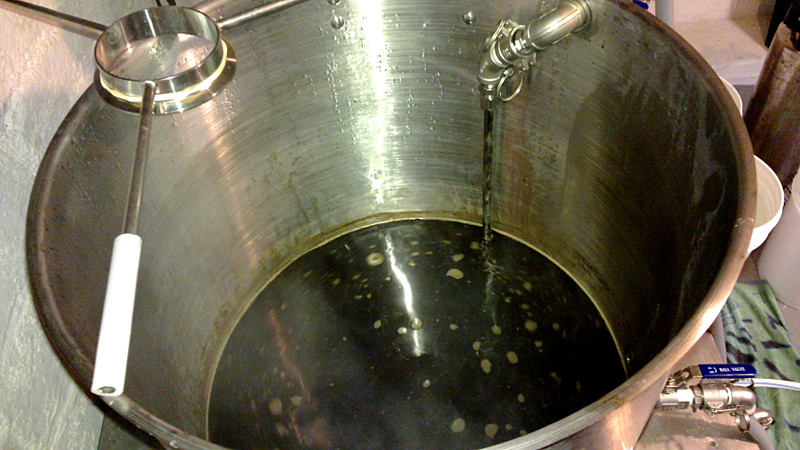
First runnings were 15.5° Plato (1.062) and at boil start we had 7.5 gallons @ 13° Plato (1.052).  Remember the brown sugar pumpkin water nectar goodness collected during the pumpkin roasting?  Throw that into the boil kettle now for an extra pumpkin shot.

At the end of the boil there was a ton of hot break, helped along by Whirlfloc at the 10 minute mark.  We finished with 5 gallons of 16° Plato (1.065) wort, chilled, kegged, oxygenated, and pitched the Wyeast 1217 Northwest Ale yeast.

The Fermentation

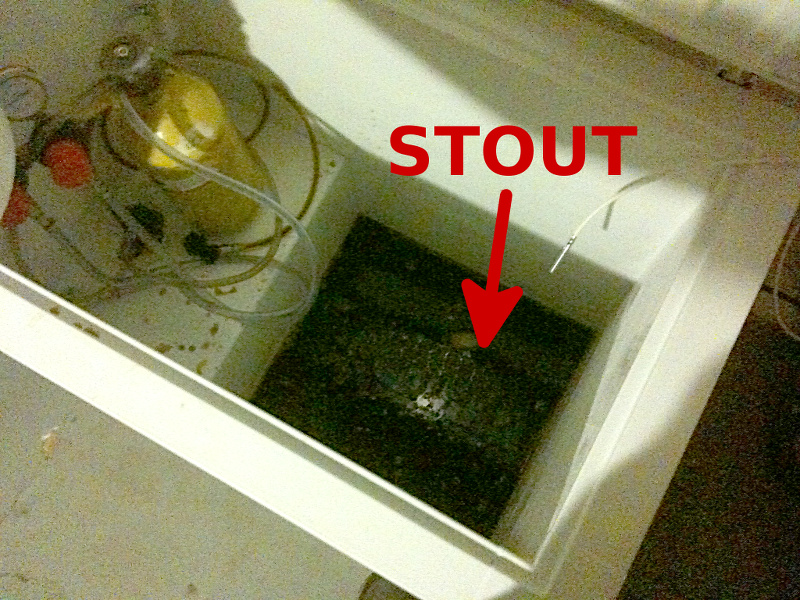
Unfortunately, our fermentation fridge was filled with tapped kegs, and our Son of Fermentation Chiller got infested by ants last summer and had to be tossed.  So this beer’s fermentation was at ambient temperatures of about 65°F during the day, and 60°F at night. If the temperature dropped below 63°F a seedling heat mat was used to raise the temperature slightly, to ensure complete fermentation.  Even with the lower temperatures, fermentation was vigorous and almost explosive, finishing at 1.012 for a total of 6.3% ABV.

Tasting the blowoff foam indicated a good amount spice may have been lost out the airlock, since the spices are light and buoyant.  This may have tempered their effect on the final taste, but we’ll have to ferment a future batch in a large bucket to be sure.

The Evaluation

We found Pumpkin #2 to be less malty than #1, which we attribute to a different yeast (Wyeast 1217 instead of the original 1469) and lack of Maris Otter malt which the first version contained.  Number 2 also finished about 7 gravity points lower than the first, so we carbonated it more highly to increase mouth-feel.  That combined with a slightly sweeter taste from the Special B gives this brew just the kind of pumpkin pie flavor we wanted.  We believe this version achieved the right balance of spice, crystal sweetness, and grain maltiness that we want out of pumpkin beer.

Ringwood Old Thumper

Continuing the fine tradition of Using Stuff Up, we have another British clone.  Oddly we’re almost all done with the bag Maris Otter we bought in April, which means we’re about 6 months ahead of the last bag we bought.  Keeps things fresh.

This one is another clone from Graham Wheeler’s Brew Your Own British Real Ale (3rd Edition).  We really wanted to do something else from Pattinson’s The Homebrewer’s Guide to Vintage Beer but almost everything in it seems to require invert sugar and we didn’t have 4 free hours to make any.  No fear though, we’ll do that soon.

Wheeler lists Old Thumper at 5.7% ABV, while Ringwood itself gives 5.1% ABV.  Old Thumper might have previously had a higher ABV, or possibly the bottled version has a higher ABV than the cask version which is sometimes the case.  No clue about that, but we’ll take the high end.

The Recipe

Name: Ringwood Old Thumper
Batch size: 5 gallons
Expected OG: 1.056 (75% efficiency)
Expected FG: 1.013
Expected IBU: 39
Mash: 90m @ 151°F

 9.4 lbs Munton's Maris Otter
  10 oz  Briess Torrefied Wheat
   7 oz  Munton's Crystal 60L
   1 oz  UK Chocolate 350L

   1 oz  Challenger    8.7%AA @ 90m
 0.4 oz  Kent Goldings 6.5%AA @ 10m
 0.6 oz  Kent Goldings 6.5%AA @  0m

1 pack Wyeast 1469 West Yorkshire

Our recipe has higher IBU than Wheeler specifies due to the alpha acid of the hops we had.  We’re also using Wyeast 1469 West Yorkshire yeast, a strain we’ve had great luck with in British ales.

The Brew

Not much interesting here.  We hit our pH target (5.35) using carbon filtered city water with no lactic acid required.  Mash-in was a bit cool at 142°F but we fixed that in due time.  The sparge yielded 8 gallons at 10° Plato (1.040) which we boiled vigorously for 105 minutes, to 5 gallons @ 15° Plato (1.060).  Right on target.  Chill, oxygenate, pitch, and done.

Fermentation was very active, even with Fermcap S in the fermenter.  We lost a pint or so to blowoff through the airlock.  Upon kegging two weeks later, it landed at 1.012 for 6.3% ABV.

And it tastes great; there’s a new-ish local fish and chips place, and what better to drink with fine cod/haddock/walleye than a fine real ale?  Cheers!

Notes on Fresh Hop

fh-glassBack in September we brewed a Fresh Hop beer with almost 5lbs of hops.  There’s no easy way to say this, we put in too many hops.  Apparently there is an upper limit.  Right after tapping the keg it tasted like chewing on hop cones, so we left it alone for a while to settle down.

While it did mellow out, it’s still not “good”.  We think this was a combination of three factors:

  • Way too many hops added too early in the process, and too many fresh hops can supposedly give a “grassy” taste.  We do get notes of grass in both taste and smell.
  • We used the hops within 48hrs but not as quickly as we should have.  Hops begin to oxidize immediately after being picked unless dried and vacuum packed.  Ours weren’t.
  • The serendipity of an unknown hop variety can be irresistable but next time we’ll resist a bit more and put them into their own SMASH brew so we know exactly what they taste like

We think we nailed the malt bill though.  It’s not too heavy and has great lacing and isn’t too sweet.  We’ll use it again, just with different hops more suited to its clean profile.

But even when you get a beer that’s not quite right, but not quite wrong, you can mix it.  A total throwback play to the 1800s, but we discovered that a 45/45/10 ratio of our Imperial Stout/Pumpkin/Fresh Hop was great.  Don’t waste a beer!

1867 Barclay Perkins EI

beerguideIf you haven’t read Ron Pattinson’s “Shut up about Barclay Perkins” blog or leafed through a copy of his recent book The Home Brewer’s Guide to Vintage Beer, you’re missing out, especially if you like British beer.  The book is crammed full of recipes for historic British ales, painstakingly recreated from actual brewing records.  It’s a gem, and a must-have addition to your British real ale library along with Graham Wheeler’s Brew Your Own British Real Ale and Dave Line’s Brew Beers Like Those You Buy.  We’ve had Vintage Beer in our library for a while, just looking for an excuse to brew something from it.  Given the cooler weather and leaves and pumpkins and stuff, we thought a porter would be perfect.

The Recipe

Name: 1867 Barclay Perkins EI
Batch size: 5 gallons
Expected OG: 1.061 (70% efficiency)
Expected FG: 1.019
Expected IBU: 85
Mash: 90m @ 152°F

 8.5 lbs Munton's Maris Otter
2.25 lbs Munton's Crystal 60L
   2 lbs Brown malt
   8 oz  Black malt

   2 oz  Fuggles       5.7%AA @ 90m
   1 oz  Kent Goldings 6.5%AA @ 60m
   1 oz  Fuggles       5.3%AA @ 60m
   1 oz  Fuggles leaf  4.9%AA @ hopback
  
1 pack Safale S-04 Yeast (rehydrated)

The original recipe specified Goldings all the way through, but we had few Goldings and many Fuggles.  The hopback addition is also not in the original recipe, but when you’ve got bling you have to use it or you loose a lot of cred with the cool kids.

Note the use of brown malt, which is a 1867maltrarity these days in commercial brews, supplanted by much more efficient pale malts with small amounts of black malt for color.  Only Fuller’s still uses brown malt in quantity for their London Porter.  But with the rise of craft brewing you can find brown malt just about anywhere.

Also note the higher percentage of Crystal 60L compared to most other recipes you might have seen.  Crystal malts contain more unfermentable sugars than base malts like 2-row, Maris Otter, and Pilsner malt.  Furthermore, higher mash temps like this recipe specifies favor less fermentable sugars during the mash and thus contribute mouth-feel to the finished beer.  So we expect this porter to be fuller-bodied and sweeter than most other English beers we’ve brewed.

The Brew

Our mash efficiency was good, resulting in a much stronger pre-boil wort (8 gallons @ 12° Plato) than we expected.  But our boiloff estimate was too low, resulting in less-but-stronger wort at the end of the boil (4.5 gallons @ 18° Plato).  Ideally we would have diluted the initial wort, boiled off the same amount, and ended up right on the money.

1867boilOne reason our mash efficiency was better was that we flipped around the worn washers in our Chugger pump heads.  Since they’re almost 18 months old, and washers do wear down, the large washer at the rear of the pump head against which the impeller rides had developed a concave appearance.

This caused the impellers to rub against the rear of the pump head when the output flow was restricted, which is exactly what want when you’re sparging.  Our previous two brews suffered efficiency because our sparge rate was too high, caused by opening the pump outputs more to prevent screeching due to the worn washers.  We’re trying to track down replacements, but apparently it’s hard.  Do other brewers just not run their pumps as much as we do?  In any case, we’re glad to have found out what the issue was, and fix it for at least a couple more brews.

1867hopbackOn a side note, we’re having trouble hitting our mash temps using the Brewer’s Friend strike calculator, probably because our mash tun is a 25 gallon stainless kettle that we’re not pre-heating at all.  So all that strike water hits cold steel and chills down pretty fast.  In the future we’ll start raising our strike water temperature in an attempt to more accurately hit mash targets, which is all part of dialing your system in.

We kegged 4.5 gallons of 1.074 SG wort pumped through our hopback, and fermented at 67°F for two weeks, ending up with 1.026 SG beer for an ABV of 6.3% ABV.  That’s a much higher finishing gravity and lower ABV than we expected, which could be due to the high percentage of Crystal 60L malt.

What’s Next?

How should we use up the rest of our Maris Otter?  We’d love to brew a “stock ale” from The Home Brewer’s Guide to Vintage Beer so maybe we’ll try making our own invert sugar, which most of these recipes seem to require.  Till then!

Fresh Hop

vinesMost “seasonal” beers seem to contain spices associated with a holiday (pumpkin or spruce), added fruit flavor to be more refreshing (lemon and shandy), or follow a style that’s brewed at a specific time of year (Oktoberfest and Maibock).  But fresh hops make beer truly seasonal the same way corn-on-the-cob means summer and pumpkins means fall.

Hops are typically harvested around late August and early September, and once picked they must be used immediately or dried.  While they can be stored fresh under the right conditions (eg, refrigerated without light) for at most 48 hours, over that time the fresh hops gradually oxidize and loose their flavor and aroma.  The sooner you brew with fresh hops, the better.

The part of the hop used for beer is the “cone”, the light-green flower-like groups of petals shown above.  The base of the cone contains lupulin glands which have the good stuff we brewers really want, including the bittering, aroma, and flavor compounds that make beer taste like beer.

So when a friend mentioned she grew hops and nobody wanted them, we jumped at the chance to spend a beautiful morning picking almost 5 lbs of Cascade and Nugget, and a day later, 4 oz of another unknown variety from a neighbor down the street.  Since they are all home-grown almost everything was unknown; we have no idea what their alpha or beta acid contents are, we don’t really know what they taste or smell like, they’re just there.  Use them or loose them.

So we used them, but how?  So many ways…

  • Mash hops: added to the mash; supposedly adds aroma and flavor that carry through the entire process to the final beer
  • First Wort Hops (FWH): added to the boil kettle while sparging the mash; soaks them in hot wort for longer, extracting more hop goodness
  • Bittering hops: added near the beginning of the boil to provide bitterness by isomerization of the hop’s alpha acids, but most flavor and aroma compounds are driven off by the extended agitation of the boil
  • Flavor/aroma hops: added late in the boil to contribute flavor and aroma but little bitterness; due to the short boiling time the compounds are not boiled off
  • Hop bursting: many, many hops added within the last 20 minutes or so of the boil; the large amount contributes some bitterness, but is described as less harsh than early boil additions
  • Whirlpool hops: added when the wort has cooled to around 180F after boiling, and recirculated for some period of time (typically 15 to 45 minutes) to extract yet more flavor and aroma
  • Hopback: a canister filled with hops, through which boiling wort is pumped before being immediately chilled and put into a fermenter; contributes even more aroma that most other methods

We decided to do them all, because we Brew It Right.  Well, except Whirlpool hops, because they are incompatible with using a hopback since the hopback requires near-boiling wort to extract maximum aroma, while the whirlpool chills the wort to much lower temperatures.  But we’ve got 5 lbs of fresh hops, so why not?

The Recipe

Name: Fresh Hop
Batch size: 5 gallons
Expected OG: 1.060
Expected FG: 1.014
Expected IBU: ??
Mash: 60m @ 150°F

  11 lbs Rahr 2-Row
   8 oz  Vienna
   8 oz  Brewers Crystals
   4 oz  Crystal 10L
   4 oz  Carapils

   5 oz  Fresh Nugget    (mash hops)
  10 oz  Fresh Nugget    (FWH)
  10 oz  Fresh Cascade   (FWH)
  12 oz  Fresh Nugget  @ 10m
  12 oz  Fresh Cascade @ 10m
  12 oz  Fresh Nugget  @  5m
  12 oz  Fresh Cascade @  5m
   2 oz  Fresh ??      @  0m
   2 oz  Fresh ??        (hopback)
  
1 pack Safale S-05 Yeast (rehydrated)

The Hops

hops
Cascade, unknown, and Nugget

The mash hops stop touching wort at the end of the mash, but the first wort hops stay from the time the sparge starts until the boil is done, so they contribute most of the bitterness.  Then we hop-burst with two-and-a-half times as many hops in the last 10  minutes to maximize the flavor and aroma, which is where fresh hops really shine.

Many other recipes recommend using dried bittering hops instead of fresh hops, since fresh hops can cause a grassy taste when used in quantity, and you can’t control bitterness because you don’t know the alpha acid content.  But we’re going all fresh here, so dried hops don’t work for us.

But how much should we use?  Since we don’t know what the alpha acid content is, and we don’t even know which variety one plant was, we have no idea how bitter the beer will be.  We can get a rough estimate by taking the mid-range alpha acid content, and using 5 to 6 times as much fresh hops as pellet hops (since they still contain lots of water), but it’s still just an estimate.  That doesn’t help at all with the unknown variety, so we used it only later in the boil and in the hopback.

The Malt

When fresh, we want hops to be the star.  But we still need some malt backbone too.  A fresh hop beer should be simple, with mostly two-row malt.  The Vienna should add some malty notes, but 8oz (4%) isn’t enough to bust through and take over.  The Crystal 10L (2%) should provide a touch of sweetness but again not enough to pick out.  And a dash of Carapils for body and head retention.

Hmm, what about the Brewer’s Crystals?  More on that below…

The Brew

fwh2

We had three hiccups with the brew.  First, we use Chugger magnetic-drive pumps where the liquid side is completely separated from motor itself to ensure sanitary conditions.  Unfortunately, there is a Teflon thrust washer that the impeller rides against, and these do wear out.  Our HLT pump screeches whenever the flow is low (like during the sparge where slow is better) so we had to keep a higher flow.  This meant we were under gravity by about 5 points (7.5g @ 1.040 instead of 7.5g @ 1.045) at the beginning of the boil because the quick sparge couldn’t rinse as much residual sugar out of the grains.

But we had Brewer’s Crystals lying around, just waiting for our first attempt at cloning the pride of Baltimore, Natty Boh.  They look like white sugar but mimic the profile of wort. So while corn sugar dries out the beer and contributes no body, Brewer’s Crystals should produce something more beer-like.

Second, since there was so much debris in our boil kettle from the fresh hops, the hopback clogged halfway through the chilling process.  We packed way too many hops into it, which did their job too well.  Every brew is a learning experience, right?

Finally, our Wyeast 1332 Northwest Ale smackpack didn’t swell, so we tossed it and used Safale US-05 dry yeast instead.  We bought the 1332 in May when it was fresh, but liquid yeast viability decreases about 20% per month, compared to 4% for dry yeast.  So by September only 15% of the cells in our pack were alive and well.  Had we used it we would have severely under-pitched, leading to stressed yeast, longer lag-time and increased infection possibility, and increased ester formation.  To ensure a great fermentation, always pitch a sufficient amount of yeast and always maintain a correct temperature range.  And always keep a spare pack of dry yeast around for situations just like this.

The Result

After these minor setbacks, we ended up with 5 gallons of 14P (1.057) wort, which smelled extremely hoppy, tasted very floral, and had a mellow bitterness.  The fermentation chamber smelled even better during our daily check-ups.  We’re excited about this one, and we’ll do a proper tasting review when it’s ready!

English Stout Rebrew

After the previous batch ended up on the floor of the freezer, we re-brewed the Use-it-up Stout last month.  This time we’ll call it English Stout, because we had used up all the old Maris Otter malt and had to buy more.  Now that we’ve been able to sample all five gallons we think it turned out very well.

This time we also entered it in a local homebrew competition in the American Stout category (13E) and it received a mediocre score.  We believe this was for three reasons:

  1. It was brewed about 25 days before the competition and did not have sufficient time to carbonate correctly, despite having been shaken at 30psi and then left at 16psi @ 40F for a day or two.  When bottled for competition the beer was almost flat.  Unfortunately, a week later it was correctly carbonated.
  2. The beer is best after about 4 to 5 weeks of aging, so the beer we sent to the competition was still too green and the flavors had not mellowed enough.
  3. American Stout was probably the wrong category for this beer, and it was docked points for not being to style.  Unfortunately, we’re not sure what category it does belong in, but re-reading the style guidelines, it may fit better in the Foreign Extra Stout category.  We’re not sure why we didn’t pick that category in the first place.

So if you’re going to enter a competition, do your research and pick the right category.  Also, know when your beer is at its prime, and make that the time when the judges crack the bottle open.

PSA: Tighten Your MFL Fittings With a Wrench

stout-spillIf you don’t, this could be your next beer.  And no, you can’t put it back into the keg and hope for the best, because you have no idea what kind of junk the previous owner of your keezer stored in there.  It just won’t taste right.  How do we know?  Don’t ask.  So when you have a nice full keg of delicious beer, make sure you use a wrench and don’t just finger-tighten the MFL fittings onto your disconnects.

Thankfully we got to drink a few pints of the Use-it-up Stout and it was great.  So great, in fact, that we brewed it again this week and hit most of the numbers spot on.  But it’s likely nothing will ever measure up to our recollection of how great our taste of the first batch was, right before it escaped into the freezer.

You have been warned.

Use-it-up Bitter

blb-panel

The Maris Otter is almost gone.  Seriously.  And seeing as how it’s no longer cold outside a nice, simple, drinkable beer is required.  Digging deep into Graham Wheeler’s Brew Your Own British Real Ale we came up with Big Lamp Bitter.  Here we’ve adjusted the recipe for US/Standard measurements and added a few IBUs so that we don’t have any partial ounces of hops left-over.

Name: Big Lamp Bitter
Batch size: 5 gallons
Expected OG: 1.042
Expected FG: 1.010
Expected IBU: 30
Mash: 90m @ 152°F (Brew-in-a-bag)

  7.1 lbs Muntons Maris Otter 3L
    6 oz  Muntons Medium Crystal 60L

1 oz Goldings      5.5% AA @ 60m
Whirlfloc + yeast nutrient @ 10m
1 oz Fuggles       5.7% AA @  5m

1 pack Safale S-05 Yeast

OK, so it’s not really a traditional bitter since we’re using S-05 yeast instead of a real British variety.  And we’re only hopping for 60 minutes while Wheeler adds the hops at the start of the 90 minute boil for all his recipes.  But whatever.

The Brew

This time we decided to use the Brew-In-A-Bag (BIAB) method instead of the traditional 3-vessel setup, mostly to see if we’d hit the numbers and if the brew day would be shorter.  If you’re not familiar with BIAB, here’s the basic process:

  • fill your kettle with the full pre-boil volume of water, plus whatever the grain will absorb
  • heat all the water to the strike temperature (be sure to use a calculator for this, since there’s more water the temperature will drop less than regular methods after adding the grain)
  • secure your bag in the kettle, then mill your grain and dump it into the bag
  • stir the grain in the bag to break up dough-balls
  • proceed with your mash
  • pull out the grain bag, optionally rinse to extract more sugars, and squeeze to get as much liquid as you can
  • proceed with your boil

In theory BIAB should take less time and less equipment, and for the most part that’s correct.  We’ve actually done BIAB on this system before we finished building the HLT and the mash tun, so we have some data to go by.

blb-mash

We heated almost 9 gallons of strike water to 155°F and added the grain, which dropped the mash temperature to the expected 152°F and a pH of 5.6, which we adjusted to 5.4 with lactic acid.  A half-hour into the mash the wort was 6°P.  But now it was dinner time so we let the mash recirculate for a total of 2 hours.  Upon return, after squeezing all the liquid we could out of the grain, we ended up with 8.5 gallons of 6.5°P (1.026) wort, while we actually wanted 8 gallons of 1.028 wort instead.  Boil-off time!

After 30 minutes of boil-off, we had 8 gallons of 7°P wort (1.028) and started the real boil.  Uneventful.  90 minutes later we had 5 gallons of 1.040 wort and an excellent hot break, all of which we dumped into the fermenter.

Did BIAB save us time?  Yes, some, but not a lot.  We keep trying to save time and never quite do it, so maybe the problem is us…  Did we hit the numbers?  No, not really, but we weren’t that far off.  Had we mashed with less water, and boiled less vigorously, we may have gotten closer to the expected gravities.  But did BIAB make cleanup easier?  Definitely; only one kettle to scrub!

The Beer

big-lamp-bitter10 days later, after fermenting around 65°F, we transferred the 1.009 beer to a keg.  A week after that we had a light refreshing beer with a sessionable ABV of about 4%.  It’s not very complex (obviously) but it’s a great summer beer.  We’d brew this again, which means we Brewed It Right™.

Use-it-up Stout

Continuing the fine tradition of using stuff up, our next attempt at disposing of the year-old Maris Otter and British hops is a stout.

Name: Stout
Batch size: 5 gallons
Expected OG: 1.062
Expected FG: 1.016
Mash: 90m @ 152F at 1.3 qt/lb

  9.25 lbs Muntons Maris Otter 3L
  1.0  lb  Briess Chocolate 350L
   12  oz  Muntons Medium Crystal 60L
   12  oz  Muntons Dark Crystal 150L
    6  oz  Briess Black Malt 500L  
    6  oz  Torrefied Wheat

1 oz Challenger    8.7% AA @ 60m
1 oz Fuggles       5.7% AA @ 15m
1 oz Challenger    8.7% AA @ 10m
Whirlfloc + yeast nutrient @ 10m
1 oz Fuggles       5.7% AA @  5m

1 pack Safale S-04 Yeast

The Maris Otter, VIctory, and C60 are the oldest malt of the bunch, bought at the same time as all the hops in March 2013.

The Hose

A burst water hose provided the entertainment for the day.  When building our setup we used a two-foot section of silicone high-temp hose (the same as we use between our kettles) from the wall-mounted water hookup to the cartridge filter mounted on our brewing bench.  Hey, we already had it, so why not?

stout-host-burst
BOOM goes the hose

Unfortunately, standard silicone hose that home-brewers use has a max working pressure of about 10PSI.  Most houses have a pressure of 40 – 60 PSI, so clearly this wasn’t going to work for long.  A loud BANG followed by the sound of gushing water first scared the crap out of us, then horrified us as we scrambled to shut off the water and mop up the floor.  The hose broke into three sections, with the center section burst right down the middle.

Carbon filters remove chlorine well, but only remove chloramine effectively when the flow rate is around 1 gallon per minute or less.  We had drilled a 1/16″ hole in a quarter and placed this into the camlock which is hard-plumbed to our water supply, which reduces the flow rate.  We thought it would also reduce the pressure in the hose, but apparently it takes a lot of pressure to push water through a carbon cartridge filter, at least more than silicone hose can take.

So we’ll be re-working our water supply to use high-pressure food-grade PVC hose from the wall hookup to the filter, since we don’t really want to clean up all that water again.

The Brew

With the fun all over, we lost a few degrees between the HLT and the mash tun when transferring the strike water, which we’ll have to compensate for in the future.  Instead of mashing at 152F, like we intended, the mash stayed around 148F.  But like we mentioned before, since the heat exchanger in the HLT was at 152F, some conversion still happens at the right temperature even if the mash is a bit low.

stout-mill
Dark grains, light grains

pH settled right on target around 5.3, from the strike water’s original pH of 7.0.  Since the recipe uses a fairly high percentage of dark grains, it’s not surprising the mash pH dropped this low.

Continuing a tradition, we batch sparged for a third time.  For the first batch we ended up with 5.25 gallons at 13.5 Plato (1.055).  We added another 4 gallons of 152F water and recirculated for a few minutes, and then drew off 4.5 gallons at 5.5 Plato (1.022) for the second batch.  Combining the entire first batch and 2.25 gallons of the second batch gave us 7.5 gallons of 10.5 Plato (1.042) wort to start the boil.

stout-mash-color
Dark mash is dark

After the boil, we used our new whirlpool arm to circulate wort from the boil kettle through the pump, to the counterflow chiller, and back to the kettle.  We then drained the boil kettle directly into a keg which we oxygenated and then pitched the packet of S-04 without rehydrating. This procedure does increase the risk of infection, since chilled wort is in contact with more surfaces (boil kettle, pump, chiller, hoses) than our usual direct-to-fermenter procedure.

stout-whirlpool
Whirlpool time

Our whirlpool produced a somewhat slower whirlpool than we were hoping, but it did have the desired effect.  All the trub (hop bits, grain bits, hot break, and cold break) concentrates in the middle due to the magic of physics. We then drain clear wort from the side, using a 90 degree side pickup, leaving the junk in the middle.

In the end, we got 5 gallons of 14 Plato (1.060) wort into the fermenter, about what we expected.  Thankfully we put the keg into a spare plastic dishpan, since we woke up the next morning to foam and splatter out the airlock, despite using Fermcap S.  Didn’t loose much beer, but next time we’ll just put less wort in the keg.

Use-it-up ESB

We bought hops and malt in bulk last year, thinking we’d brew more than we have.  Well, that’s not true, we thought we’d brew more British beer over the last 12 months.  But we didn’t, and now we need to use it up.

What better way to use British malt than brew a British beer?

Name: ESB
Batch size: 5 gallons
Expected OG: 1.055
Expected FG: 1.014
Mash: 90m @ 151F at 1.3 qt/lb

  9 lbs Muntons Maris Otter 3L
  1 lb  Briess Victory 28L
  6 oz  Muntons Medium Crystal 60L
  6 oz  UK Crystal 150L

1 oz Challenger    8.7% AA @ 90m
1 oz Kent Goldings 5.5% AA @ 15m
1 oz Kent Goldings 5.5% AA @  5m
Whirlfloc + yeast nutrient @ 10m

1 pack Wyeast 1469 West Yorkshire

The only ingredients that are “fresh” are the yeast and the Crystal 150L.  Not that older ingredients will make bad beer, but obviously the fresher the ingredients, the better the beer will be.  But don’t get us wrong, we just like beer so we’ll drink it anyway.

The Brew

We mashed at 151F for 90 minutes, and then batch sparged again (mostly to refine our process).  The first batch yielded a respectable 5 gallons @ 13P (1.053).  Next we added another 5 gallons of 150F water, recirculated for 15 minutes, and drained off 4 gallons @ 5.25P (1.021).  We combined the entire first batch and 3 gallons of the second batch in the boil kettle, for a total of 8 gallons @ 10P (1.040).  We thought the low gravity required a volume reduction, so after 30 minutes of boil-off, the real boil started with 7.5 gallons @ 11.25P (1.045).

At the end of the 90 minute boil we got a bit less than 5 gallons at a much higher gravity than we expected: 1.068 OG.  What happened?  It turns out these numbers are completely expected.  We simply started with too little wort; instead of boiling off a half-gallon, we should have begun with all 8 gallons of 10P (1.040) wort and boiled down to 5.5 gallons over the 90 minute boil (at a 1.67 g/hr boil-off rate) to achieve the target gravity of 1.055.  Oh well.

We also over-boiled our oxygenation stone when cleaning and sanitizing it, which broke the stone away from the MFL fitting that connects the stone to the oxygen hose.  So we used the tried-and-true pour method of oxygenation, dumping the cooled wort from the keg into a sanitized bucket, and then back into the keg through a funnel.  The funnel provided a bigger pour target and a more concentrated stream into the keg, which produce quite a bit of foam and thus oxygenation.  So much so that it foamed out of the keg and onto the floor.  Oops.

The Beer

After 18 days of fermentation between 59 degrees (night) and 65 degrees (day) we racked to a secondary keg.  Oddly, flocculation was awful.  Final gravity ended up at 1.014 for a healthy 7% ABV, which like the OG, was way over what we expected.  That’s 78% apparent attenuation, which is quite high for this yeast.  Maybe the yeast nutrient we added or good aeration helped the yeast be extra-efficient?

A month after brew day, the beer was clear and drinkable.  It lacked some body due to the lower mash temperature (151F) and low percentage (7%) of crystal malt.  Next time, we’ll try mashing a bit higher (153F) and if that doesn’t work well enough, we’ll up the crystal to 10% or 12% of the grain bill.  The higher alcohol content caused an unwelcome bite versus the IBUs (~50), which created a slightly off-balance final product.  Correctly managing the boil gravity will solve that problem next time.

But it looks good, and tastes OK, and we like beer.  We’ll drink it!