All posts by admin

IPA Time

ipa-grain

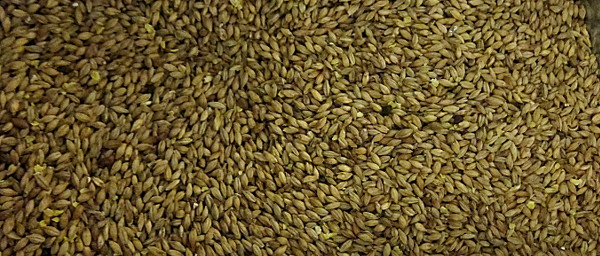
Hard to believe, but Brew It Right™ hasn’t brewed an IPA since early July.  So we decided to dig into this one by researching the ingredients and statistics of a number of IPAs we enjoy and respect, and construct rough parameters and ingredient options based on them.  Then we created a unique recipe within this framework and brewed it.  We will continue refining this recipe until we Brew It Right™.

Within the Parameters

Using ingredients and characteristics of the research beers (Fulton Sweet Child of Vine, Summit Unchained #6, Summit Silver Anniversary Ale, Summit Saga IPA, Surly Furious, Hopworks Organic IPA, and Bell’s Two-Hearted), we wanted to brew an IPA within the following ranges:

IBU: 60 - 70
SRM: 5 - 20
ABV: 6.1% - 6.5%
OG: 1.057 - 1.065
FG: 1.010 - 1.015
Hops: Centennial, Amarillo, Simcoe, Citra
Malt: 2-Row (US and British), Golden Promise, Crystal, Munich

Some of the beers feature less-used hops (Rakau, Palisade, Glacier, Boadicea, Pilgrim), but we’re sticking with American hops.  We’ll branch out to include some Golden Promise for a bit more sweetness and depth.  Since we’re not a huge fan of crystal-bombs, the C60 is only 4% of the grain bill, and there’s a bit of roast barley thrown in for color because nobody had Black Patent lying around.  Target OG is 15.4 Plato (1.063).

The Brew
Mash time
Mash time

The mash got off to a great start, hitting mash temp exactly at 151F.  After about 75 minutes of mashing, sparge first runnings resulting were 14.75 Plato (1.060), and the first four gallons at 14 Plato (1.057).  Unfortunately, the sparge went long, ending up with about 8 gallons at 10.5 Plato (1.044), and the required boil gravity got mis-calculated, requiring a long boil-off.  An hour later the actual boil started with 6.5 gallons of what was later discovered to be 12.4 Plato (1.050) wort.

Happy as a clam, if clams fermented

Upon realizing that the 45 minute hop addition had been forgotten, it was added along with the 30 minute hops instead.  But not to fear, 45 minute hop additions don’t really contribute that much flavor over 60 or 30 additions.  Next time this is brewed, we’ll skip the 45 minute and bump up the 60 and the 30 minute additions to compensate.

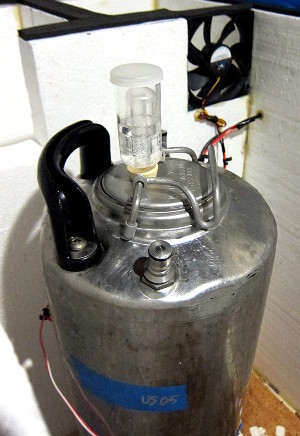
The boil resulted in 4.75 gallons of 18 Plato wort (1.074) chilled and kegged, with rehydrated US-05 yeast pitched and fermentation set at 67°F in the fermentation chamber.

Racking to Secondary

Wow, what an awful taste.  First off, too sweet, and the aroma hops (mostly Cluster) just don’t work with the sweetness of the malt.  Maybe it will get better with time, but we certainly know what we won’t do in the future: pair a large amount of Golden Promise with late-addition Cluster.

Vent Times Two

When building the original Brew It Right™ brewery, the only viable vent option was out the glass-block window behind the brew bench.  Time for Q&A:

How you do you vent out a glass block window?

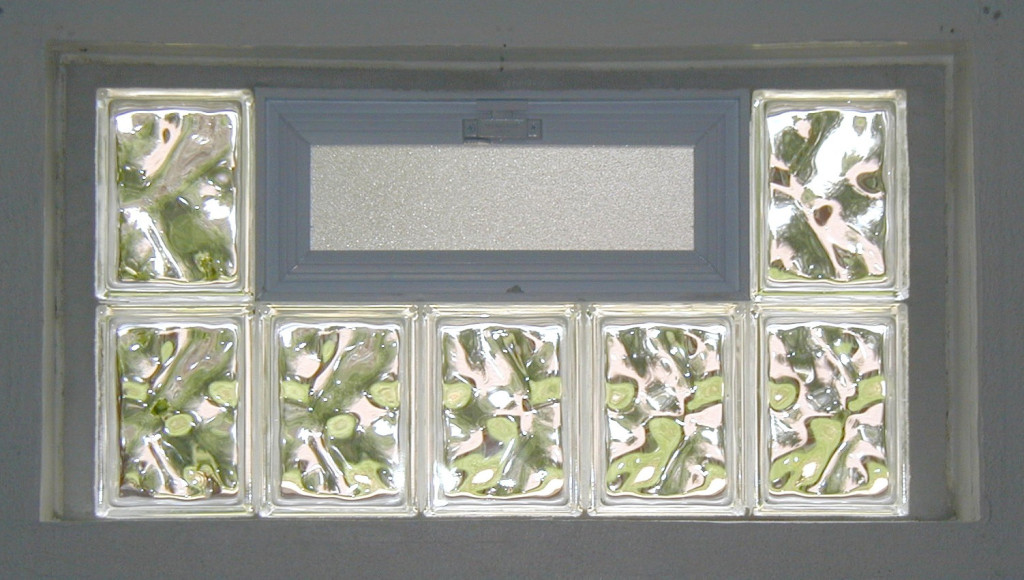
Basement_pan_frame_vented_Frazier1

You start with a window that looks like this.  Notice how the blocks beside the pull-down vent are not square; this prevents using 6″ PVC drain pipe because the blocks are less than 6″ wide.  So you have to use 4″ PVC drain pipe instead, which means you buy a 105mm diamond grit hole saw to cut through the blocks.  Yes, there was a $25-off coupon the day I bought it.  Yes, it was still stupidly expensive.  But here at Brew It Right™ we also Do It Right.

Hot tip: buy the Bosch mandrel so you don’t walk all over the glass when you’re starting your cut, otherwise you’ll end up with some modern glass block art that looks nothing like a 4″ hole.

Aren’t there two sides to each glass block?

You’re entirely correct!  It’s like cutting tile, only it’s thicker and takes 5 times longer to cut!  Each side is about a half-inch thick, and it takes a really, really long time to drill through.  Worse yet, you have to make sure that the outside hole is slightly lower than the inside one, so that any condensation that makes it through the fan trickles down to the vent, not back into the fan.

Hot tip #2: spray the cut with water periodically to reduce heat and friction.

Wait, isn’t 105mm smaller than the outer diameter of 4″ PVC drain pipe?

Correct again!  Unfortunately, diamond grit hole saws larger than 105mm are insanely expensive.  We don’t do it that right here at Brew It Right™ ’cause damn, we’re not rich.  So instead, cut a 105mm hole and then use a $5 grinding bit on the end of a drill until the 4″ drain pipe fits.  Then silicone seal to weatherize and fill in the gaps.

Two fans are better than one

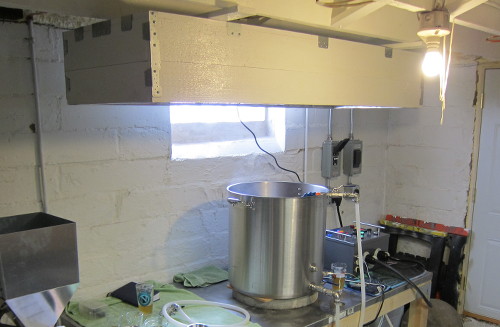
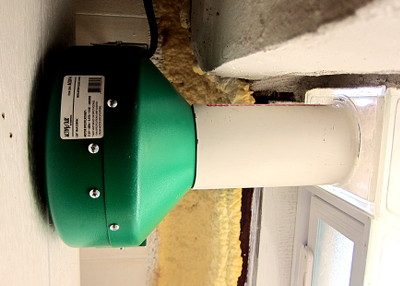
basic-ventThe original plan called for a single ActiveAir ACDF6 in-line fan hooked up to a 6″->4″ PVC reducer, then vented out the glass block window.  Unfortunately, the 6″ fan doesn’t pull out enough steam to handle a full boil.  Brew It Right™ has no idea why this is the case; perhaps it has something to do with back-pressure created by the reducer which kills the CFMs.  The vent itself closely follows Kal’s dimensions for his custom condensate hood, including the size (about 11″ tall) and height above the boil kettle (16″), so it seems like the fan and reducer are the problem.

Clearly a second fan is in order; Brew It Right™ purchased a 4″ in-line ActiveAir fan and installed on the opposite side of the glass block window.  Obviously this entailed using the diamond grit hole saw a second time, which nobody here was particularly enthusiastic about due to the time required and bodily contortions involved.

vent-hole
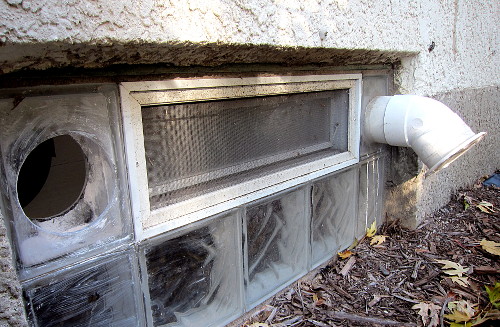
A Tale of Two Vents – Before
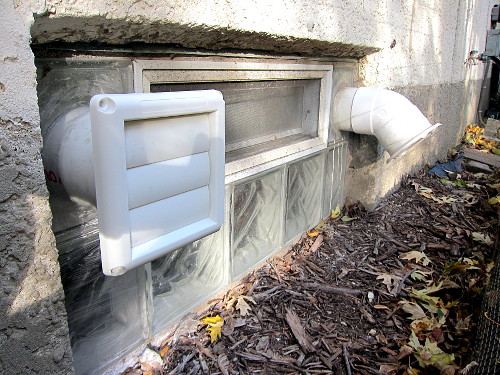
A Tale of Two Vents - After
A Tale of Two Vents – After

Keen observers will note that a different exterior vent is used on the new fan.  The original cover was a spring-loaded flush exterior vent, but it turns out the spring isn’t very strong and you have to go outside to make sure it closes every time you use it.  It’s cold here in the winter, so that’s not very fun.  Thus the standard dryer vent cover on the new vent, a product of trying and half-failing the first time around.

Inside, the new fan was mounted to a bady-cut cut hole in the vent using a Dremel 4000 with a router bit, since there wasn’t enough space for the jigsaw used for the original 6″ fan hole.  Then, 4″ PVC drain pipe was slid through the hole and over the fan outlet, and a standard clothes dryer vent attached to the end of the drain pipe with silicone.

final-vent-inside

The fan was then secured to the ceiling using thick metal bars to ensure it didn’t vibrate itself out of place.  While we haven’t brewed with it yet, we’re confident it will provide the CFM boost required to pull out the extra moisture that the 6″ fan cannot.  Updates to come on how it works out…

Fuller’s London Porter and Cider Updates

Refractometer Crash Course

We’ve got two fermenters to check.  But we don’t want to pull a whole hydrometer sample for either of them.  What to do?  Use a refractometer!

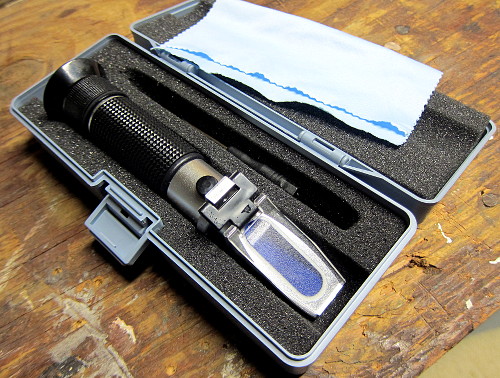
New Toy!!!
Brew It Right’s latest new toy!

Since a refractometer takes a few drops of sample at a time, it’s trivially easy to measure fermentation progress.  But remember, they are calibrated for water not alcohol, so after fermentation starts you need a calculator to get the correct gravity.  Also, refractometers typically measure in Brix, a scale normally used for wine.  So until you’re comfortable with readings in Brix (or the practically equivalent Plato scale), you’ll want to convert between Brix and Specific Gravity using a different calculator.  Yay Internet!  So many useful calculators!

A refractometer works by measuring how light changes when is passes through a liquid.  Plain water bends light differently than does a solution full of sugar or a solution of sugar and alcohol.  By looking at how much that light bends, you can measure how much sugar is in solution.  Distilled water should always show a Brix/Plato value of 0 (1.000 SG), while unfermented wort typically starts anywhere from 10 (1.040 SG) to 20 (1.083 SG) depending on the beer.

Since the sample is so small, a refractometer is also extremely useful while fly sparging, to ensure gravity doesn’t fall below the magic 1.010 where tannin extraction might occur.  The two or three drops required for the refractometer cool within seconds, as opposed to 5 or 10 minutes for a full hydrometer sample in an un-agitated water bath.

So, fill a bowl with water, add your favorite sanitizer (StarSan or Saniclean), and sterilize your pipette.  Be sure to suck some sanitizer into the pipette and squeeze it out too, instead of just sanitizing the outside.  Next, open your fermenter and suck up a few samples and squeeze them into a glass.  Do this until you have enough for a taste.  Then, use the pipette to cover the prism of the refractometer with beer,and flip the sample plate down.  Hold the refractometer up to the light, look through it, and note where the color change occurs on the scale.  That’s your reading in Brix.

Teh Porter

It’s been two weeks since the porter was brewed, so how’s it doing?  Well, airlock bubbles have slowed to about 30 seconds-per-bubble, but as everyone knows that’s not a reliable indicator of anything.  But gravity is!  So using our trusty refractometer [ed – how trusty can it be already if it’s so new?] we pipette out a sample and measure it: 9 Brix, about 1.019 SG.

Huh, that seems pretty high, since we were expecting around 1.014.  There could be a few things going on here; first, the yeast (Wyeast 1968 London ESB) only attenuates 67 – 71%.  Second, we may have overshot the mash temperatures a bit, resulting in a less-fermentable wort.  Third, the grain bill may simply be less fermentable, and indeed, reviews of the brown malt I purchased from Northern Brewer indicate this: “Be warned, however, that this malt produces a poorly attenuating wort unless you use it in moderation and mash at a slightly low temperature.”  Oh well, the sample still tastes great!

Tomorrow I’ll try to rouse the yeast with a large sanitized spoon, but we may be near the end on this one.  Last resort: pitch some WLP007 Dry English Ale yeast and hope the alcohol shock doesn’t kill them all.

Teh Cider

In the other corner, the cider is still chugging away.  It’s been fermenting for a month, which is pretty common for a cider.  Last week I measured 7 Brix (1.014) and this week it’s at 6 Brix (1.006), with bubbles still about 8 seconds apart.  The sample has a ton of apple character, but is somewhat thin due to the lack of residual sugar.  It seems my strategy of using a low-attenuating/low-alcohol tolerant yeast (WLP002) to retain some sugar just isn’t going to work…

So we’ll sit on this one for a while, at least until the gravity sample stays unchanged for a few days and the airlock activity is slower.  Then we bottle!

British Series: Fuller’s London Porter

fpsparge2

Double IPA blah blah Belgian blah blah.  Nobody seems to care much about Porters these days, but they have a long and storied history starting in the working-class neighborhoods of London.  And Autumn is a perfect time to brew one.

I was intrigued by the use of brown malt in Fuller’s London Porter, as it used to be the only malt you could get (until the Industrial Revolution foisted “smokeless” fuels upon the world) and thus adds historic character to the recipe.  Since I can’t recall any craft beer I’ve tasted that uses it, I’ll have to fall on that sword and try it out.

But there’s a problem.  Wheeler has one recipe, while Brew Your Own has a different one, and the Interwebs have many others.  Which one is right?  Wheeler’s recipe (converted from 19L) clocked in at 19 SRM and low on alcohol, but it does use a 90 minute boil like most British recipes.  BYO, on the other hand, used a 60 minute boil, but all of the stats checked out, and the recipe was reviewed by Fuller’s themselves.  Thus BYO it was.

For yeast, sources recommend Wyeast 1968 London ESB or White Labs WLP002, both of which are reputed to be Fuller’s yeast.  This strain doesn’t have very high alchohol tolerance, and doesn’t attenuate very well, leading calculators to indicate my FG would be high around 1.018 or 1.019.  I’m hoping it decides to outperform.

The Recipe

Expected OG: 1.054
Expected FG: 1.014
Mash: 90m @ 153F at 1.3 qt/lb

8.3 lbs Muntons Maris Otter
1.0 lb Muntons Light Crystal 60L
1.5 lbs UK Brown Malt
0.75 lbs American Chocolate

1.25 oz Fuggles @ 60m
0.75 oz Fuggles @ 10m
Whirlfloc @ 10m

Wyeast 1968 London ESB

The Brew

Due to bad planning I didn’t have enough Chocolate malt, so I had to substitute 4 oz of roast barley.  I also added 1oz black malt for a slightly darker color as the BYO recipe also didn’t come out quite as dark as I wanted.  Neither of these changes will have much effect on the flavor, thankfully.

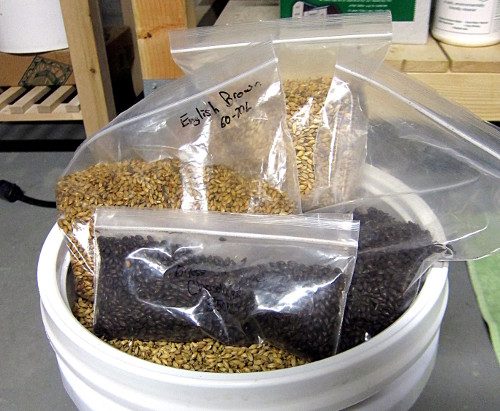
fpgrains
Grains money shot…
Damn that hopper is big...
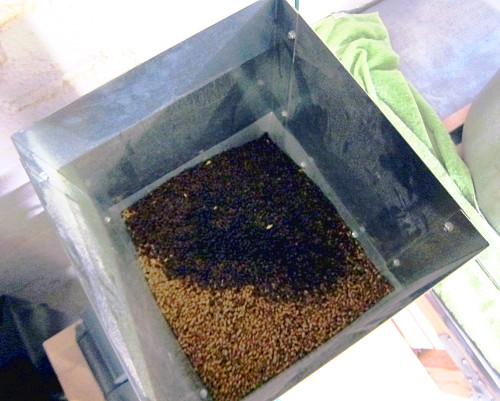
Only 11 lbs of grain.  Damn that hopper is big…

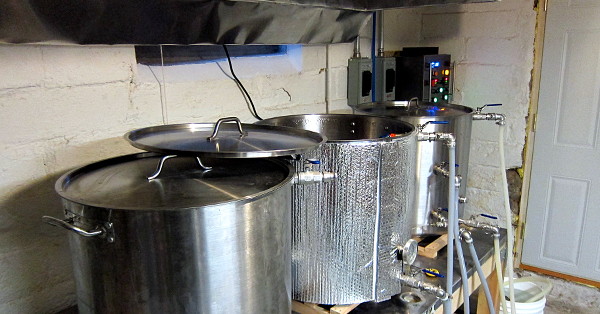
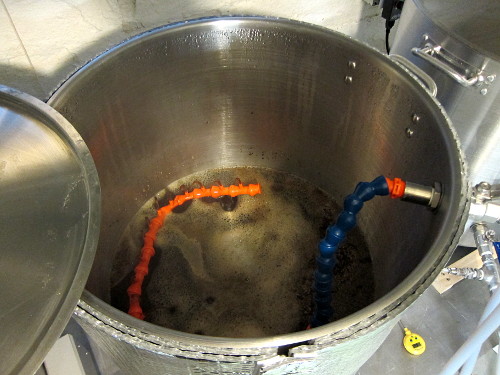
Mash-in is somewhat complicated because I try to keep the HERMS coil underwater in the HLT to ensure mash temperature is as stable as possible.  So after reaching strike temps in the HLT, I run the strike water to the MLT and set up recirculation through the HERMS coil to ensure the strike water remains at strike temperature.  Once that’s done, I shut off the mash pump, dough in, and let the mash rest while I refill the HLT with cold water until it has dropped to mash temp, which takes a few minutes.  Then I start up the mash pump again and off we go.

Starting at 164F and adding the grain set the mash temp right on target: 153F.  The large proportion of dark grains dropped the mash pH to 5.4, which I adjusted down to 5.3-ish using lactic acid.  Most brews with lighter grain bills start around pH 5.8 with my city water, so this was a pleasant surprise.

Mash time!
Mash time!

First runnings were 1.052, and the sparge ran long at almost 1 1/2 hours to collect about 7 gallons with a boil gravity of 1.044.  That gravity seemed a little low for a 60 minute boil, so I ended up doing a 90 minute boil to reduce volume and bump up the gravity.  I stuck with the hop schedule though, adding the hops with 60 and 10 minutes left in the boil.  Ending gravity was 1.062 into the fermenter.

Which means some number is wrong.  I’m very confident that the 1.062 is right, meaning that the boil gravity reading is somehow incorrect.  There are two possibilities here.  First, perhaps I didn’t stir the boil kettle enough before drawing off a sample;  wort does stratify in the boil kettle since the first runnings are higher gravity than later ones.  Second, since hydrometers don’t work well over 80F I have to cool wort samples down, and I do that in a bucket of water.  I may have let some of that water get into the sample, diluting the gravity.  Solving this second problem requires buying a refractometer, which uses small samples that cool very quickly.  Solving the first problem requires not being lazy.

Regardless, the airlock is happily bubbling away at 66F, and in two weeks we’ll know how awesome it tastes.  Cheers!

Tis the Season for Organic Hard Cider

Hey, it’s Fall, and how better to ring in the new season (short as it is) than make some hard cider?

So Saturday found me using one of these to help press 8 or 9 bushels of organic apples into delicious, juicy cider.  We had a great operation going with two people washing and cleaning the apples, and two working the cider press.  Lo and behold, sure enough, out came 20 gallons of liquid gold.  For my toils I took home 5 gallons, which I promptly pasteurized at 170F for 30 minutes, cooled, and pitched.

While I’ve brewed a bunch of beer in my time, cider is all new to me.  Research indicates that I want to reduce spoilage potential by charging up my initial 1.046 OG.  So I added 10oz of corn sugar and 1/2 cup organic dark brown sugar, for a final OG of 1.056.

Next, since the sugars in cider are much simpler than wort, we expect the cider to ferment out completely, yielding a very dry end product.  There are ways to stop yeast activity (chemical bombing, cold-crashing, bottle pasteurization) but they all seem either not-organic, require fridge space, or involve shards of glass.  So my hail-Mary pass is to use WLP002 yeast, which is known to (a) attenuate badly and (b) dislike alcohol.  Hopefully it’ll drop early and leave some residual sugar around so I don’t end up with apple-flavored rocket fuel.

It’s now at 68F in my fermentation chamber, where it’ll stay for a couple weeks, then get bottled with some priming sugar and sit around for another few weeks.  Then bottoms up!

New Orleans Beer Time

If you’re in a town for a conference, you might as well find some good beer.

Crescent City Brew House

With a name that mentions nothing about it’s attempt to recreate a little bit of Bavaria in delta country, the Crescent City Brew House seems to be the only brewpub downtown.  Nice atmosphere, not trendy, not fancy.  The staff was friendly and helpful.  The food was OK, but this being NOLA it was quite meat heavy.

Beware they only do lager, the founder is apparently German and brews according to the Reinheitsgebot, so if you like hops look elsewhere.  And unfortunately for beer geeks, they haven’t jumped on the specs bandwagon, so no malt, hops, IBUs, gravity, or explanations for anything.  A bit old-fashioned, you could say.

  • Pilsner – billed as a “light, crisp, and traditionally hoppy beer, with a soft palette and floral bouquet”.  It met expectations.
  • Red Stallion – “A malty, aromatic and hoppy mixture. Copper colored, this beer is medium bodied and full of flavor. Vienna Style.”  I would have liked more malt, but this one was solid too.
  • Black Forest – “A full-bodied dark mahogany beer, with a rich malty texture. It is sparsely hopped, in the traditional Munich style.”  Also solid.

They also only serve 12, 20, and 24oz glasses.  No pint glasses here you English-loving tool!  All the beer was “solid” for German lager with no particular standouts

Final score: one thumb up from Brew It Right.

New Orleans Lager & Ale (NOLA)

One microbrew (besides Abita) that everyone seems to have on tap is NOLA Blonde.  This was the bright spot wherever I happened to be, because it’s a good, solid blonde ale.  You should try it.  It’s like Summit EPA: no matter what bar you’re in, they’re going to have it because it’s “local”, and that means you don’t have to drink Miller Lite like a chump.

Next up: Hopitoulas.  A great IPA, which you should try, but I can’t give you tasting notes or bouquets or backbones or resins or any of that stuff, as I was fairly drunk by then and I’m not going to take notes when I’m having fun.

Final score: two thumbs up from Brew It Right.

Fill a Growler From Your Keg

Have you ever wanted to fill a growler from your keg without the beer tasting like cardboard the next day?  Have you never, ever run across BierMuncher’s post on the topic?  Well today’s your lucky day!  Hold on, because it’s really complicated…

The Parts
1 x 5/16" siphon tube
1 x #6 Drilled Stopper
1 x Party tap kit (unless you've already got one)
The Tools
Coping saw (or other fine-toothed saw)
Fine grit sandpaper
The Procedure
Cut thee carefully...
Cut thee carefully…

Cut the large black seal off the bottom of the tube.  Then cut the hook off the top of the top, but make the cut diagonal.  Use the sandpaper to smooth all the burrs off both ends, both inside and out.

Then work the drilled stopped up the siphon tube, with the small/bottom side of the stopper closer to the diagonally cut end of the tube.  Check it against your growlers so that the tube touches the bottom of the growler and the stopper seals well in the growler’s mouth.  For a normal-size growler, the bottom of the stopper will be a bit over 9 3/4″ from the pointy end of the tube.  You’re done!

The Pour

filler-finished

You’ll need a party tap (or “cobra” tap) since this doesn’t work with Perlicks and the like.  Once you’ve hooked the party tap up to your keg, slip the flat end of the filler tube into the outlet of the party tap. It’ll be snug, but that’s good.  Twist it in if you have to, but it shouldn’t take too much force.  You also don’t want to shove it in too far, otherwise you’ll block the tap’s gasket mechanism. No worries, you’ll get it.

Now purge your growler with CO2.  It also helps if the growler is cold, but it doesn’t really matter.  Insert the tube into the growler, making sure the stopper forms a good seal.  Pull the tap trigger and watch the beer flow!  It’ll foam a bit at first but you shouldn’t get too much.  The flow will stop as the pressure builds up inside the growler, so now just squeeze the stopper a bit to let some CO2 out and keep filling until the foam hits the neck of the growler.

Mmmm fresh beer.  Enjoy!

Build Me a Randall

randallmeMy brother-in-law’s birthday was coming up, and this year he’s been into Randalls.  So I figured why not build one, I know there are plans out there.  You can even buy them on eBay, but how much fun is that?  Rhetorical question; it’s not fun.  What is fun is building it yourself.

Unfortunately, while researching this, nobody said where they got the internal filter tube.  I need links, people!  So I’ll do the Internet a service and post actual links to stuff I bought.   So if you really want to make a Randall just like mine, it’ll be dead-simple.  You’re welcome.

First, the criteria.  The filter tube must be sanitary, high-polish 304 or 316 stainless steel.  Some people use PVC, but ewwww.  Second, it’s got to have easy keg connects, which means MFL fittings onto which I can screw all the kegging stuff I already have.

The Parts
1 x 1/4" NPT Cartridge filter housing
1 x No. 2 solid stopper (NB SS2)
2 x 1/4" MFL to 1/4" MPT
1 x Teflon plumber's tape
1 x 50-pack AS568A Dash 206 Silicone O-Ring (McMaster 9396K208)
1 x Sanitary Stainless Steel Tube 3/4" OD .62" ID (McMaster 4466K731)
 The Tools
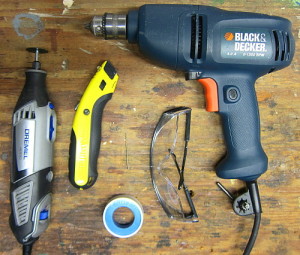
toolsDremel with re-inforced cutoff wheel and grinder, drill, 1/8″ bit, utility knife, safety glasses, Teflon tape, and a hacksaw (not pictured).

A Brief Word on Stainless Tubing

If you’re observant you’ll note I bought my internal filter/dip tube from McMaster Carr because they’re awesome, not because they’re cheap.  I couldn’t find cheap stainless high-polish tubes on the Internet, despite lots of searching.  I really tried.  McMaster’s tubing is high-polish but it’s also 0.065″ wall which is really hard to drill with small bits.  More on this later.

Step 1:  Put a hole in a box
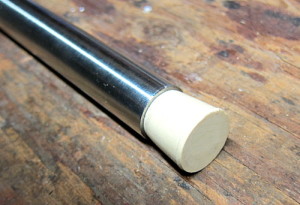
stopperActually, first you want to cut the #2 solid stopper in half.  The solid stopper (rather than a drilled one) forms a better seal at the bottom of the filter housing and helps keep the filter tube in place, as you’ll see later.  Discard the large end, and shave down the edges of of the small end so it fits very snugly in the end of your stainless tube.  When inserted in the filter housing, the stopped will keep the tube upright and stable while you screw on the filter’s cap.

Step 2: Measure and cut your tube
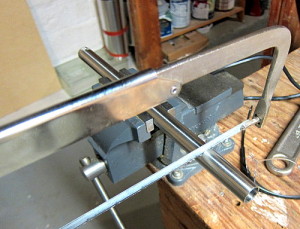
tube-cuttingThis is really the only hard part; you really don’t want to cut it too short, or it won’t seal right.  And obviously you can’t cut it too long, or the cap can’t seal.  If you’re using the same filter I am, then a length of 9 5/16″ is about right.  9 3/8″ isn’t going to kill you though.  If you just cut this length, fine, don’t blame me if it doesn’t work. Make sure it’s the right length first, by cutting longer than you need, checking, and then recutting if you need to.  You don’t want to F this up or you’re out $15.

Step 3: Taper your tube
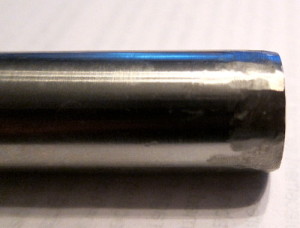
taperThe listed cartridge filter outlet at the top of the cap isn’t quite 3/4″ in diameter, so you’ll want to taper one end of the stainless tube to make sure it fits into the hole in the filter cap.  You can do this with either a Dremmel or a metal file, but either way, just keep filing it down all around the end of the tube until it fits snuggly into the filter head.  Remember to put a silicon O-Ring in the filter cap first, which forms the top seal.

Step 4: Drill like a Boss
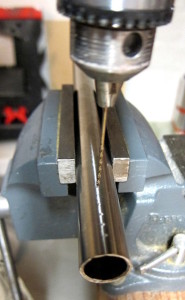
drillHere’s where you make the Randall a Randall.  You want to drill a bunch of 1/8″ holes in the opposite end of the stainless tube from the taper you just made.  This is the end that sits at the bottom of the filter and sucks up all the hoppy goodness that your Randall was born to provide.  Just drill some holes.  You can drill as many or as few as you like, and in whatever pattern you like.  Drill baby drill!  Show your true colors.

I drilled two rows 90 degrees apart, all the way through, from 1/4″ to 2 1/2″ from the bottom of the pipe.  You’re drilling at the bottom (where the stopper will be) because the beer flows from the top of the filter, through the hops, and down to the bottom of the filter where the holes in your stainless tube filter out any large particles and finally channel the beer out of the filter and into your tap.

When you’re done, grind out all the burrs and make sure both the inside and outside of the tube are smooth.  Use a file or a Dremmel or sandpaper or whatever you want.  But you really don’t want metal filings in your beer.

Step 5: Fit like a Boss

Now you get to wrap the MPT ends of your MFL/MPT fittings in Teflon tape, and carefully screw them into the filter cap.  Remember, the cap is plastic, so you don’t want to screw them down too hard and split the cap or strip the threads.  Screw them finger-tight, and then use a crescent wrench to turn them about one or two more turns until they are snug.

Step 6: Put it all together
topbottom

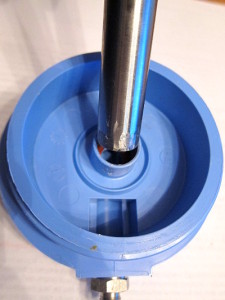
Insert the half-stopper into the bottom of the stainless tube, at the same end your drilled the holes.  Then put one of the silicone O-Rings into the center hole of the filter cap.  Insert the tapered end of the stainless tube into the filter cap, and then carefully screw the filter cap down onto the filter, making sure the rubber stopper end seats correctly into the bottom of the filter.  Guess what?  You’ve got a Randall.

Using your Randall
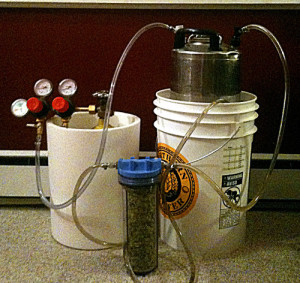
randall-in-useSo you’re going to a party and bringing your kegs and your Randall because you’re the Guy with the Beer.  How do you use this thing?  Well, you hook CO2 up to your keg, then you hook your beverage out line to the Randall’s “in” side.  Then you hook your tap up to the Randall’s “out” side.

Next up, what to put inside?  Leap hops, clearly.  Never ever use pellets.  But think outside the box here.  Grapefruit.  Bell peppers.  Cherries.  Hot peppers.  Vanilla beans.  But if you ever do hops, I have some advice; soak them in water overnight first, otherwise you’re going to taste bitter grass all night and nobody will drink your beer.  The AA of your hops won’t really matter much, what you’re getting out of your hops are the aroma and flavor chemicals.  Remember, if something doesn’t taste good, you can always take it out and put something else in, even in the middle of the keg.

So there you go.  Randall hard, my friends!