Category Archives: Bling

Whirlpool Fever

The Players

Since our boil kettle was first constructed last year we followed Kal’s lead and used a Hop Stopper to filter wort.  This product works fairly well and prevents both hops and some break material from hitting the chiller and eventually the fermenter.  It’s easy to clean with a kitchen sprayer, and is very well constructed.

The Setup

But the Hop Stopper does have some drawbacks:

  • efficiency: quite a bit of wort is left in the kettle. We use sanitary magnetic drive pumps (like Chugger, US Solar, or March) to transfer wort and these require continuous flow with no air pockets, otherwise the pumps lose prime.  When the wort level gets below the Hop Stopper, the hops and hot break clogging the screen prevent wort from getting inside the screen quickly enough, and air gets into the lines instead.  Also, because our kettles are quite large, each gallon is less than 1 inch in height, and the bottom is flat (unlike a Sanke keg), which means that when the wort level drops too low for the Hop Stopper, we still have a full gallon  or two left.
  • babysitting: When the wort level gets too low, you either have to leave wort in the kettle or use a spoon to agitate the hop stopper (by pressing down and releasing every second) to let more wort into the screen.  This does work, but if you’re trying to control the flow through the pump to hit the right temperature, agitate the Hop Stopper screen, and watch for when air starts to enter the pump intake to prevent loss of prime, you’re likely to screw something up because everything is happening at once.  You need five hands, and you’ve only got four, or maybe even just two.
  • whirlpooling: you can’t easily whirlpool since the Hop Stopper blocks the circulation pattern, and picks up from the center instead of the side.  We’re interested in this technique that many traditional breweries use and we’d like to replicate it in our setup.

The Hook

Whirlpooling is the circulation of the wort in the boil kettle after the boil is done to concentrate the hot break, cold break, grain particles, and hop bits into the center of the kettle.  Due to the magic of physics and fluid dynamics solid particles will move to the center when the liquid is stirred and then allowed to settle.  This leaves clear wort at the sides, and with a side pickup in the kettle, allows you to leave most of the solid stuff behind providing clearer wort and eventually clearer beer.

Second, you can use the whirlpool to provide increased hop aroma and flavor by steeping a separate addition of hops while the whirlpool is circulating.  Since during the whirlpool the wort is around 170 – 200°F (82 – 93°C) volatile flavor and aroma compounds are not driven off like they are during the boil.  Many traditional UK breweries use this technique to increase the complexity and clarity of their beer.  We’d like to try it too.

The Tale

The first step was the removal of the Hop Stopper and the addition of a side pickup.  Instead of a traditional dip tube, we decided to use a 90° street elbowwp-before and a barb fitting at the bottom outlet of the kettle.  Besides the whirlpool benefits, during the cleaning process when recirculating PBW after a brew session, we need to drain all the PBW water from the kettle, which is now easily accomplished by tilting the kettle towards the barb.  In short, the new barb fitting allows us to drain almost all liquid from the kettle, whether that’s wort or cleaning water.

Since the barb draws from the side, after the whirlpool has settled all the break material and hops in the center, and only clear wort is left on the sides, we’ll only get clear wort into the fermenter.

Next because we use pumps, we need some mechanism to induce the whirlpool in the kettle.  Yes, we could stir vigorously with a spoon, and we’ve tried that, but it doesn’t work as well as you’d think due to the magnesium anode, the heating element, and the thermometer getting in the way during 5 gallon brews.  Instead, we constructed a whirlpool arm that attaches to our kettle inlet and is easily removed forwp-after increased flexibility.
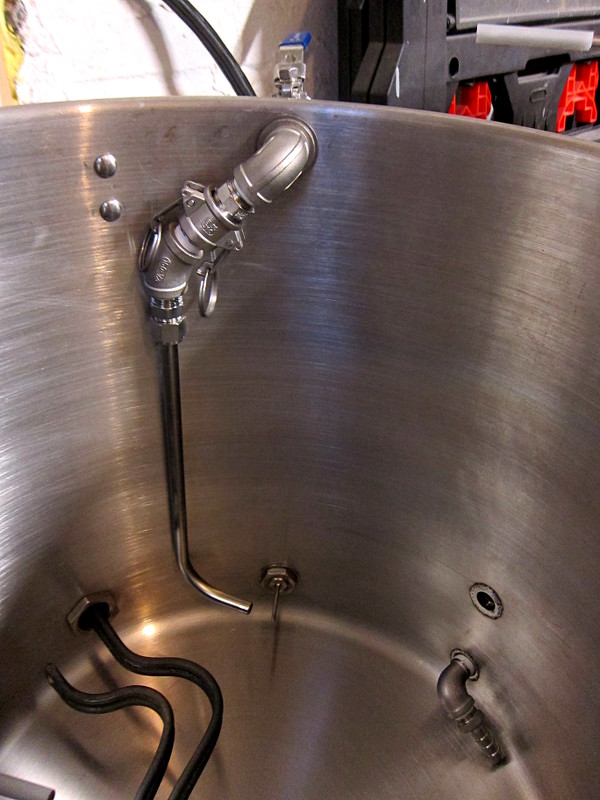
As you can see, attached to the upper kettle inlet is the new whirlpool arm, which directs the wort along the side of the kettle and induces the actual whirlpool when wort is taken from the kettle and pumped back in.  The bottom level of the arm allows us to still brew and whirlpool 5 gallon batches if we want to.

Why did we choose a camlock fitting for the arm?  Well, when we’re fly-sparging, wort is continuously draining into the kettle and we need to monitor the gravity to ensure it doesn’t drop below 1.010, which begins to extract undesirable tannins from the grain husks in the mash.  The boil kettle inlet is where we collect the sample from, and we need it to be easily accessible, so we’ll only attach the whirlpool arm after the boil is done.  Second, allowing the whirlpool arm to be disconnected helps ensure it can be cleaned well.

The Finale

We don’t actually have a finale yet since we haven’t tried the whirlpool arm in a full brew.  But we have tried the kettle outlet barb fitting, and it works great.  We’ll definitely let you know how the whirlpool arm performs in the next brew.  Stay tuned!
PSA: Fermcap S is not God

Jubelale Backstory

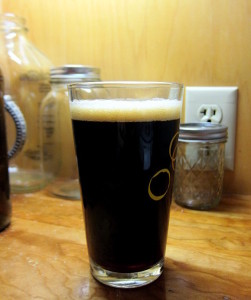
A while back we brewed a Deschutes Jubelale 2009 clone, and it is great.  It’s different than it should be, but in a really good way: it’s darker and stoutier, almost like a Russian Imperial Stout, but with less alcohol and not quite as bitter.  Why?

jubelale-glass

It finished really, really high at 1.024, eight points above where it should have been.  In a lighter beer that gravity would taste very out of balance, but it works great in darker ones.  But like always, when something doesn’t turn out like you expect, you need a post-mortem.

The first reason for the high finish could be lack of oxygen in the wort.  After you pitch the yeast they need replenish their nutrient reserves before they are healthy enough to reproduce and begin fermenting the wort.  That requires oxygen, but most of the oxygen is driven off during the boil.  This is why you’re told to rock the fermenter or pour the hot wort back and forth between buckets.  Here, we pump the beer through a strainer into the keg, which apparently doesn’t work that well.  This hasn’t been a huge problem until now, but we need to step it up.

The second reason is likely inconsistent fermentation temperature.  Since the refrigerator with the two-stage controller is currently our kegerator, we’re running a bit under-staffed in the temperature control department for fermentation. All we’ve got is our styrofoam Son of Fermentation Chiller hooked up to an old thermostat wired for cooling, but not for heat.  Come winter the basement temperature drops below optimal for ale yeast during the later stages of fermentation, leading to higher final gravities. We need to do better.

Double Rye IPA

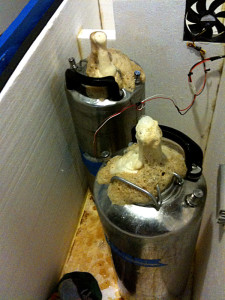
So when we brewed another beer last week, we stepped up our game with an aeration stone and oxygen regulator and Bernzomatic O2 canister.  Two 15 second bursts are all it takes to get more oxygen than 5 minutes of bucket rocking can do, giving the yeast a great start in life.  Then we add some Fermcap S to keep the krausen down since we ferment in kegs.  Imagine our surprise the next day when we find this:

ryesplosion
Yay aeration?

And that is why Fermcap S is not God.  No amount of Fermcap will prevent an overfilled keg, an overly active fermentation, and really happy yeast from becoming a volcano. Clean-up was not fun.  Next time we’ll just put less wort in the kegs.

On the temperature front, we have a 7 cubic foot chest freezer on-deck and a slightly more affordable controller with support for a heater on the way.  Stay tuned to see how that comes together.

Each time we get a bit closer to Brewing it Right.  So will you!

Vent Times Two

When building the original Brew It Right™ brewery, the only viable vent option was out the glass-block window behind the brew bench.  Time for Q&A:

How you do you vent out a glass block window?

Basement_pan_frame_vented_Frazier1

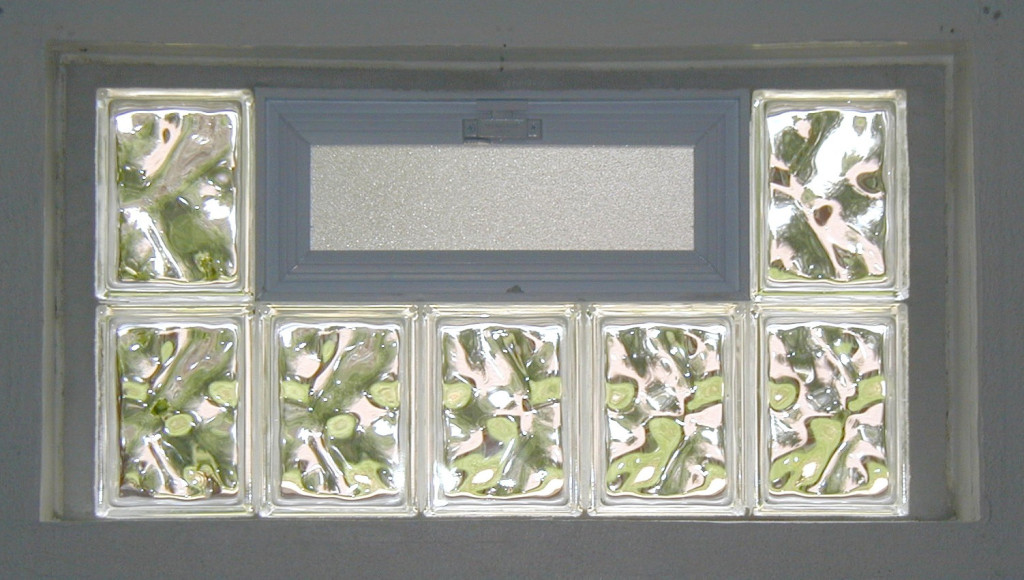
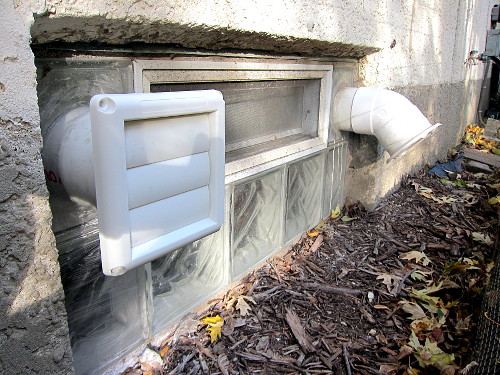
You start with a window that looks like this.  Notice how the blocks beside the pull-down vent are not square; this prevents using 6″ PVC drain pipe because the blocks are less than 6″ wide.  So you have to use 4″ PVC drain pipe instead, which means you buy a 105mm diamond grit hole saw to cut through the blocks.  Yes, there was a $25-off coupon the day I bought it.  Yes, it was still stupidly expensive.  But here at Brew It Right™ we also Do It Right.

Hot tip: buy the Bosch mandrel so you don’t walk all over the glass when you’re starting your cut, otherwise you’ll end up with some modern glass block art that looks nothing like a 4″ hole.

Aren’t there two sides to each glass block?

You’re entirely correct!  It’s like cutting tile, only it’s thicker and takes 5 times longer to cut!  Each side is about a half-inch thick, and it takes a really, really long time to drill through.  Worse yet, you have to make sure that the outside hole is slightly lower than the inside one, so that any condensation that makes it through the fan trickles down to the vent, not back into the fan.

Hot tip #2: spray the cut with water periodically to reduce heat and friction.

Wait, isn’t 105mm smaller than the outer diameter of 4″ PVC drain pipe?

Correct again!  Unfortunately, diamond grit hole saws larger than 105mm are insanely expensive.  We don’t do it that right here at Brew It Right™ ’cause damn, we’re not rich.  So instead, cut a 105mm hole and then use a $5 grinding bit on the end of a drill until the 4″ drain pipe fits.  Then silicone seal to weatherize and fill in the gaps.

Two fans are better than one

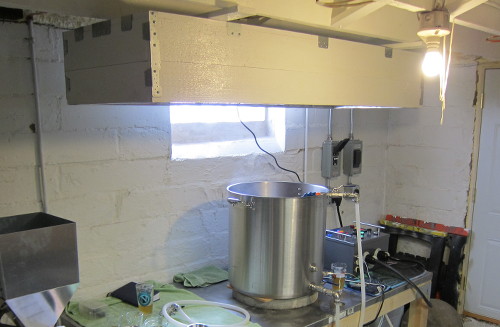
basic-ventThe original plan called for a single ActiveAir ACDF6 in-line fan hooked up to a 6″->4″ PVC reducer, then vented out the glass block window.  Unfortunately, the 6″ fan doesn’t pull out enough steam to handle a full boil.  Brew It Right™ has no idea why this is the case; perhaps it has something to do with back-pressure created by the reducer which kills the CFMs.  The vent itself closely follows Kal’s dimensions for his custom condensate hood, including the size (about 11″ tall) and height above the boil kettle (16″), so it seems like the fan and reducer are the problem.

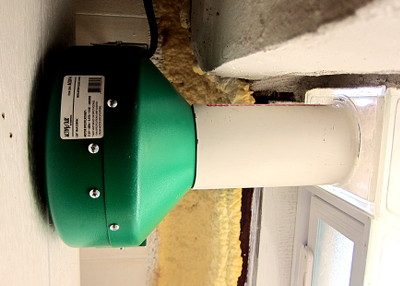
Clearly a second fan is in order; Brew It Right™ purchased a 4″ in-line ActiveAir fan and installed on the opposite side of the glass block window.  Obviously this entailed using the diamond grit hole saw a second time, which nobody here was particularly enthusiastic about due to the time required and bodily contortions involved.

vent-hole
A Tale of Two Vents – Before
A Tale of Two Vents - After
A Tale of Two Vents – After

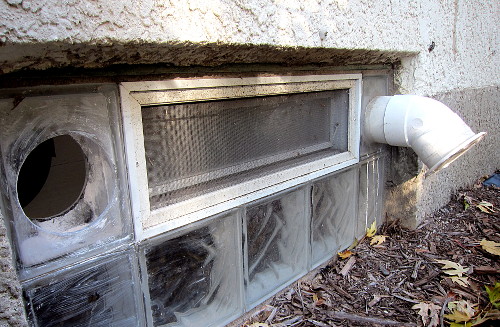
Keen observers will note that a different exterior vent is used on the new fan.  The original cover was a spring-loaded flush exterior vent, but it turns out the spring isn’t very strong and you have to go outside to make sure it closes every time you use it.  It’s cold here in the winter, so that’s not very fun.  Thus the standard dryer vent cover on the new vent, a product of trying and half-failing the first time around.

Inside, the new fan was mounted to a bady-cut cut hole in the vent using a Dremel 4000 with a router bit, since there wasn’t enough space for the jigsaw used for the original 6″ fan hole.  Then, 4″ PVC drain pipe was slid through the hole and over the fan outlet, and a standard clothes dryer vent attached to the end of the drain pipe with silicone.

final-vent-inside

The fan was then secured to the ceiling using thick metal bars to ensure it didn’t vibrate itself out of place.  While we haven’t brewed with it yet, we’re confident it will provide the CFM boost required to pull out the extra moisture that the 6″ fan cannot.  Updates to come on how it works out…

Fill a Growler From Your Keg

Have you ever wanted to fill a growler from your keg without the beer tasting like cardboard the next day?  Have you never, ever run across BierMuncher’s post on the topic?  Well today’s your lucky day!  Hold on, because it’s really complicated…

The Parts
1 x 5/16" siphon tube
1 x #6 Drilled Stopper
1 x Party tap kit (unless you've already got one)
The Tools
Coping saw (or other fine-toothed saw)
Fine grit sandpaper
The Procedure
Cut thee carefully...
Cut thee carefully…

Cut the large black seal off the bottom of the tube.  Then cut the hook off the top of the top, but make the cut diagonal.  Use the sandpaper to smooth all the burrs off both ends, both inside and out.

Then work the drilled stopped up the siphon tube, with the small/bottom side of the stopper closer to the diagonally cut end of the tube.  Check it against your growlers so that the tube touches the bottom of the growler and the stopper seals well in the growler’s mouth.  For a normal-size growler, the bottom of the stopper will be a bit over 9 3/4″ from the pointy end of the tube.  You’re done!

The Pour

filler-finished

You’ll need a party tap (or “cobra” tap) since this doesn’t work with Perlicks and the like.  Once you’ve hooked the party tap up to your keg, slip the flat end of the filler tube into the outlet of the party tap. It’ll be snug, but that’s good.  Twist it in if you have to, but it shouldn’t take too much force.  You also don’t want to shove it in too far, otherwise you’ll block the tap’s gasket mechanism. No worries, you’ll get it.

Now purge your growler with CO2.  It also helps if the growler is cold, but it doesn’t really matter.  Insert the tube into the growler, making sure the stopper forms a good seal.  Pull the tap trigger and watch the beer flow!  It’ll foam a bit at first but you shouldn’t get too much.  The flow will stop as the pressure builds up inside the growler, so now just squeeze the stopper a bit to let some CO2 out and keep filling until the foam hits the neck of the growler.

Mmmm fresh beer.  Enjoy!

Build Me a Randall

randallmeMy brother-in-law’s birthday was coming up, and this year he’s been into Randalls.  So I figured why not build one, I know there are plans out there.  You can even buy them on eBay, but how much fun is that?  Rhetorical question; it’s not fun.  What is fun is building it yourself.

Unfortunately, while researching this, nobody said where they got the internal filter tube.  I need links, people!  So I’ll do the Internet a service and post actual links to stuff I bought.   So if you really want to make a Randall just like mine, it’ll be dead-simple.  You’re welcome.

First, the criteria.  The filter tube must be sanitary, high-polish 304 or 316 stainless steel.  Some people use PVC, but ewwww.  Second, it’s got to have easy keg connects, which means MFL fittings onto which I can screw all the kegging stuff I already have.

The Parts
1 x 1/4" NPT Cartridge filter housing
1 x No. 2 solid stopper (NB SS2)
2 x 1/4" MFL to 1/4" MPT
1 x Teflon plumber's tape
1 x 50-pack AS568A Dash 206 Silicone O-Ring (McMaster 9396K208)
1 x Sanitary Stainless Steel Tube 3/4" OD .62" ID (McMaster 4466K731)
 The Tools

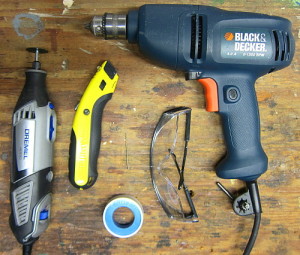
toolsDremel with re-inforced cutoff wheel and grinder, drill, 1/8″ bit, utility knife, safety glasses, Teflon tape, and a hacksaw (not pictured).

A Brief Word on Stainless Tubing

If you’re observant you’ll note I bought my internal filter/dip tube from McMaster Carr because they’re awesome, not because they’re cheap.  I couldn’t find cheap stainless high-polish tubes on the Internet, despite lots of searching.  I really tried.  McMaster’s tubing is high-polish but it’s also 0.065″ wall which is really hard to drill with small bits.  More on this later.

Step 1:  Put a hole in a box

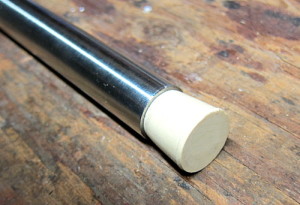
stopperActually, first you want to cut the #2 solid stopper in half.  The solid stopper (rather than a drilled one) forms a better seal at the bottom of the filter housing and helps keep the filter tube in place, as you’ll see later.  Discard the large end, and shave down the edges of of the small end so it fits very snugly in the end of your stainless tube.  When inserted in the filter housing, the stopped will keep the tube upright and stable while you screw on the filter’s cap.

Step 2: Measure and cut your tube

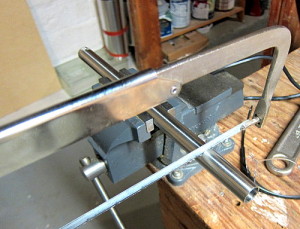
tube-cuttingThis is really the only hard part; you really don’t want to cut it too short, or it won’t seal right.  And obviously you can’t cut it too long, or the cap can’t seal.  If you’re using the same filter I am, then a length of 9 5/16″ is about right.  9 3/8″ isn’t going to kill you though.  If you just cut this length, fine, don’t blame me if it doesn’t work. Make sure it’s the right length first, by cutting longer than you need, checking, and then recutting if you need to.  You don’t want to F this up or you’re out $15.

Step 3: Taper your tube

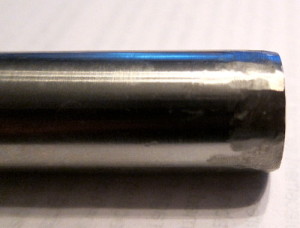
taperThe listed cartridge filter outlet at the top of the cap isn’t quite 3/4″ in diameter, so you’ll want to taper one end of the stainless tube to make sure it fits into the hole in the filter cap.  You can do this with either a Dremmel or a metal file, but either way, just keep filing it down all around the end of the tube until it fits snuggly into the filter head.  Remember to put a silicon O-Ring in the filter cap first, which forms the top seal.

Step 4: Drill like a Boss

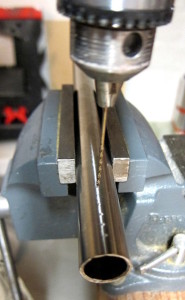
drillHere’s where you make the Randall a Randall.  You want to drill a bunch of 1/8″ holes in the opposite end of the stainless tube from the taper you just made.  This is the end that sits at the bottom of the filter and sucks up all the hoppy goodness that your Randall was born to provide.  Just drill some holes.  You can drill as many or as few as you like, and in whatever pattern you like.  Drill baby drill!  Show your true colors.

I drilled two rows 90 degrees apart, all the way through, from 1/4″ to 2 1/2″ from the bottom of the pipe.  You’re drilling at the bottom (where the stopper will be) because the beer flows from the top of the filter, through the hops, and down to the bottom of the filter where the holes in your stainless tube filter out any large particles and finally channel the beer out of the filter and into your tap.

When you’re done, grind out all the burrs and make sure both the inside and outside of the tube are smooth.  Use a file or a Dremmel or sandpaper or whatever you want.  But you really don’t want metal filings in your beer.

Step 5: Fit like a Boss

Now you get to wrap the MPT ends of your MFL/MPT fittings in Teflon tape, and carefully screw them into the filter cap.  Remember, the cap is plastic, so you don’t want to screw them down too hard and split the cap or strip the threads.  Screw them finger-tight, and then use a crescent wrench to turn them about one or two more turns until they are snug.

Step 6: Put it all together

topbottom

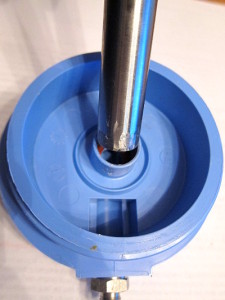
Insert the half-stopper into the bottom of the stainless tube, at the same end your drilled the holes.  Then put one of the silicone O-Rings into the center hole of the filter cap.  Insert the tapered end of the stainless tube into the filter cap, and then carefully screw the filter cap down onto the filter, making sure the rubber stopper end seats correctly into the bottom of the filter.  Guess what?  You’ve got a Randall.

Using your Randall

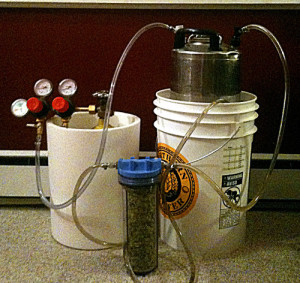
randall-in-useSo you’re going to a party and bringing your kegs and your Randall because you’re the Guy with the Beer.  How do you use this thing?  Well, you hook CO2 up to your keg, then you hook your beverage out line to the Randall’s “in” side.  Then you hook your tap up to the Randall’s “out” side.

Next up, what to put inside?  Leap hops, clearly.  Never ever use pellets.  But think outside the box here.  Grapefruit.  Bell peppers.  Cherries.  Hot peppers.  Vanilla beans.  But if you ever do hops, I have some advice; soak them in water overnight first, otherwise you’re going to taste bitter grass all night and nobody will drink your beer.  The AA of your hops won’t really matter much, what you’re getting out of your hops are the aroma and flavor chemicals.  Remember, if something doesn’t taste good, you can always take it out and put something else in, even in the middle of the keg.

So there you go.  Randall hard, my friends!